Fresh

June 1, 2022Celebrating National Donut Day
It seems as if there is a National Day for just about everything, but National Donut Day, is definitely one worth celebrating! This year, National Donut Day is on Friday, June 3rd. On that day we are donating 30¢ for every package of donuts sold to the Salvation Army to support their efforts of those in need. Be sure to pick up a package!
Did you know? The Salvation Army created National Donut Day in 1938 to honor the women who served doughnuts to soldiers in World War 1. This day began as a fundraiser for Chicago’s Salvation Army. The goal of their 1938 fundraiser was to help those in need during The Great Depression. Coborn’s Inc. has participated in the National Donut Day program to support the Salvation Army for over 10 years! In 2021, a $1,507 donation check was presented to the St. Cloud Chapter of the Salvation Army.
Remarkably Fresh Donuts made in our own Central Bakery!
We’re all about fresh, and our donuts are no exception. We have our own Central Bakery in St. Cloud MN that produces approximately 50,000 donuts and rolls per day, 6 days a week. (Talk about a sweet tooth!) Our Central bakery delivers fresh baked goods to all our Coborn’s, Cash Wise, and Marketplace Foods stores.
Employee Spotlight: Meet Marv
Marvin (“Marv”) has been with the company for 16 years! He is currently the Assistant Plant Manager at our Central Bakery. He has held many roles within the Central Bakery and even owned his own bakery before joining our team. This guy knows his stuff!
When talking with Marvin last week, he gave us an inside scoop on some fun facts about our Central Bakery and our incredibly delicious donuts. Don’t forget to check out our Coborn’s and Cash Wise Instagram accounts for a behind-the-scenes sneak peek on how our donuts are made.
A Few REMARKABLE fun facts about our fresh donuts:
A good donut always starts with quality ingredients. We’re proud to source all of our ingredients locally. Our skilled bakers carefully monitor the time and temperature of the batter and oils to make a perfect, golden brown donut.
Approximately 50,000 donut pieces are produced each day, and it takes about 20+ remarkable employees to get the job done.
Do you love the icing and sprinkles?! These donuts are hand-dipped in icing and sprinkled to perfection. It’s not as easy as it sounds- these remarkable employees have the magic touch to make these donuts taste AND looks incredible!
We have delivery trucks leaving the Central Bakery 6 days a week, bringing fresh baked goods to your local Coborn’s, Cash Wise and Marketplace Foods stores.
We produce 18 types of donuts daily, and a flavored donut hole of the month.
We produce cake donuts and raised donuts. The difference? Cake donuts use baking soda to rise, raised donuts use yeast. Both are delicious!
We hope you lean in and celebrate National Donut Day with us on Friday, June 3, 2022 to support the Salvation Army. [...]
Read more...

July 21, 2019GROWN LOCALLY. KNOWN GLOBALLY as the Best Pork in the U.S.
Comfrey Farm CERTIFIED DUROC is Now at Coborn’s, CashWise and Marketplace.
Read the Authentic Story. Taste Deliciousness.
In his 20s he gets almost as good as his father at making the rounds before the first light of dawn shows itself to the fields, sky and farm animals. All are hungrily ready to consume the sun’s boundless energy and make the most of the gift of a new day. By mid-day, he is already soaked in sweat; muscles fatigued from work not recreation; carrying the worry and burden that comes from keeping prized, pedigreed pigs fed, watered, sheltered, comfortable and in the very best of health.
There’s always that moment every day (or at least once each week) when the Comfrey Farm Duroc pig farmer—otherwise known as “grower,” “producer,” or “caretaker”—pauses with gratitude and pride. He and his family, those who have gone before him and the sons, daughters, brothers, nieces and nephews who now stand before him, working side-by-side, could have chosen an easier, quicker, and less costly route. But then they would just be making a living and not living a dream. The dream to be a different kind of pork producer, one focused on delivering the absolute best.
Less than 150 miles away is the Comfrey Farm Prime Pork pig barn and pork packing plant in Windom, MN. They will accept Durocs from its four family farms, giving them the same care and respect as the growers. Truly wholesome, natural food does not come easily or thoughtlessly. The barn was designed in collaboration with Dr. Temple Grandin to accommodate the animals in a stress-free environment for rest and roaming. The newly overhauled plant incorporates every necessary detail to live up to the promise of giving an extraordinary eating experience to flavor-seekers. It features bright, lofty spaces with highly automated robotics and temperature control, which keeps the food and workers safe while preserving the ruby-pink color and freshness of the pork. It also showcases the craftsmanship of more than a hundred skilled butchers on the floor—mothers, fathers, los jóvenes, on their feet day after day, masterfully cutting each piece of meat with the talent of an artist and the eye of an inspector.
How could this daily grind be satisfying? One taste will explain. Satisfaction comes from the consumer who calls to say she has been craving this indescribable real pork flavor since she was a child five decades ago. And from the butcher who said he has been selling pork for more than three decades and has never tasted anything more delicious than this Comfrey Farm purebred Duroc pork.
This is living our dream. We sincerely thank the entire Coborn’s family of employees and shoppers for warmly welcoming us. We invite you to experience and enjoy, time and time again, our all-natural DUROC pork on your fork. Please, be in touch with us.
@comfreyfarmprimepork | comfreyfarmpork.com [...]
Read more...

July 17, 2018Summer is in full bloom and there are so many great flowers available this time of year. If you’ve ever wanted to try your hand at designing your own floral centerpiece, this watermelon bouquet is a great place to start!
You’ll need:
1/2 Watermelon, scooped out
Floral Foam, presoaked in water
Floral Tape or Skinny Duct Tape
Floral Knife or Shears
Floral Greenery – I used Leather Leaf and Salal (Lemon Leaf) in my arrangement!
1 Dozen Red Roses
5 Pink Carnations
5 Stems Kermit Button Mums
3-5 Stems Baby’s Breath
You can use any colors of the flowers that you prefer, make it your own and have fun with it! Here’s a few tips to keep in mind as you’re creating your masterpiece.
Determine where the front of your centerpiece will be. Although you’ll push the stems into the center of the foam, you’ll want to angle the leaves or flowers slightly towards the front of the design to get the best view.
When you’re putting the stems in the foam, remember it’s not very forgiving! So once you stick it in, leave it there. Be mindful of where you’re putting it beforehand.
Strip away the extra leaves on the stems of the flowers. Those tend to die off first and grow bacteria making them mushy. By removing them you’ll allow for more air flow and your design will last much longer!
If you have extra baby’s breath left over, you can put that in a vase with water and they’ll stay good for a long time so you could use them in a future arrangement as well.
You can also use any left over items by creating a second, smaller version of your bouquet! Repeat the same process using a green pepper, just use much smaller pieces of greenery and the smallest mum buds so it’s proportional to the pepper.
I hope these tips will help you succeed with your DIY floral projects! They’re the perfect addition to summertime parties and will get you LOTS of compliments from your friends and family!
Ashley
Floral Manager, Sauk Rapids [...]
Read more...
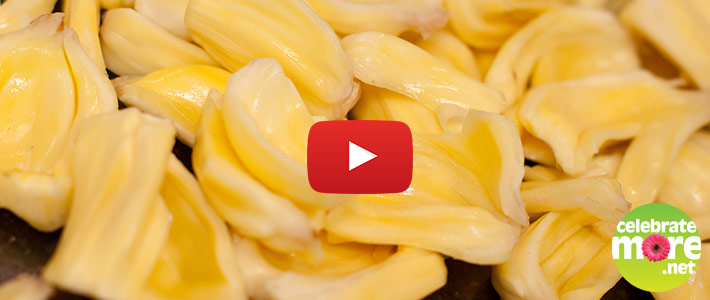
May 8, 2018Have you ever walked past one of those dinosaur eggs in the produce department and wondered what the heck it was? Or how on earth you would eat it? Those dinosaur eggs are actually a jackfruit!
Jackfruit is the largest tree-grown fruit and can weigh as much as 80 pounds! Most of the ones you’ll find in our stores are right around 20 pounds though, and a lot of times you can find them cut down into much more manageable slices.
Jackfruits are one of my favorite fruits to talk about because there are so many interesting things about them. A few fun facts I’ve learned about them are:
If you ate a whole jackfruit, you would have enough nutrition in your body to not have
to eat for two days.
Other than the core and the skin, everything else is edible. (Some parts are less desirable as they can be bitter.)
Jackfruits with brown skins are riper. Ones with green skins have a paler fruit
inside and have a less powerful flavor. Green ones are more commonly used in cooking since they take on the flavor of everything else.
A ripe jackfruit should give off a sweet smell and yield to gentle pressure.
They are rich in vitamins, minerals and dietary fiber. Low in calories and sodium and do not contain any cholesterol or unhealthy fats.
You can freeze jackfruit pods.
Jackfruit seeds, when cooked down, taste similar to a potato, but have more nutrients than potatoes do.
When cutting a jackfruit, I like to start by cutting it into 8 pieces. It makes it much more manageable and easier to get the core out so you can access the fruit pods and seeds. Although it takes a little time to do, it’s actually much easier than you would think. Check out the video above to see just how easy it is!
Bridget,
Farmer’s Market Manager
Isanti, MN [...]
Read more...

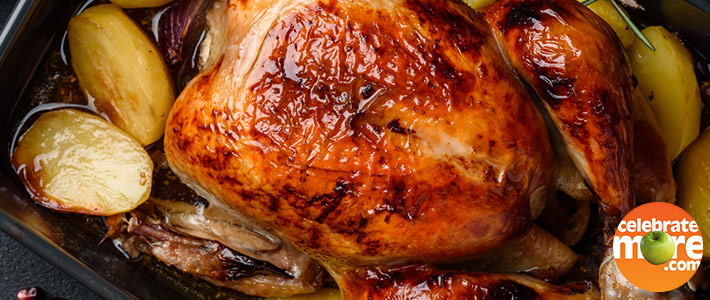
March 21, 2018How To Slice A Bone-In Ham
Many families have a traditional ham every Easter as the centerpiece on their dinner table. The Easter ham is something almost everyone looks forward to on Easter Sunday. Maybe you’re a pro at carving the ham by now, or maybe it’s your first time. Either way, you’ll find some useful tips in this quick video on how to slice a bone-in ham!
If you’re looking for the perfect recipe for your Easter Ham, try this Citrus-Molasses Glazed Ham or this Spiced Orange Glaze. They will make sure your perfectly carved ham tastes as amazing as it looks! We have lots of great recipes to help you this Easter over at our Easter Headquarters page – check it out now!
Kevin Connor,
Merchandising Specialist Team Manager for Meat and Seafood
Shop from the comfort of your home! You can shop online at any of our proud family of stores for these recipe ingredients as well as the rest of your grocery list! We offer curbside pick up at all locations and delivery in select locations as well. Don’t forget to connect your MORE Rewards account when you shop online for extra savings, digital coupons, and many other rewards too!
Shop Ingredients
Coborn’s
Cash Wise
MarketPlace Foods [...]
Read more...

February 8, 2018Valentine’s Cupcakes
Can’t decide between getting your sweetheart flowers or a delicious dessert? Here’s an idea that brings them together, an arrangement of cupcake roses! With a turn table you can make these unique looking rose cupcakes, and bonus, it’s a fun technique to try! [...]
Read more...

January 25, 2018Have you ever wondered what the difference is between the cakes you order and the ones you see on display in our stores? We get that question pretty often! Although the display cakes are not made with real cake, they do still have real frosting, and they’re made with just as much time and attention to detail.
The biggest difference with the display cakes is that they are made with styrofoam! Although it might seem like the display cakes would be easier to make, they’re actually more challenging! Styrofoam is very light, and some of the forms are hollow so they don’t like to stay put very well. They can be easier to stack since we can use different methods of lifting foam that you can’t use with real cake. You might notice in my video that I am able to use some little chop sticks to use as a handle while stacking some of the tiers.
When creating different shapes, like the cupcake for the top tier, I normally would shape the cake as close to my finished product as I can. With styrofoam I try to shape it only as much as I need to since those tiny pieces make such a huge mess! Shaping real cake is much easier. I will utilize the frosting to help build into the shape I want versus carving the foam.
I also try to make sure the details are more dramatic or enlarged with display cakes. A lot of times they’re up on a shelf where people can’t get up close to them to see all the fine details. By making the sprinkles with frosting versus using actual sprinkles, you can see them from a distance and they make a much bigger impact in the final design.
Most of the time we spend decorating cakes is spent on the base icing of each layer. The fun part is making it pretty and adding all the details to make it stand out. I love being able to get creative and try new things all the time.
Make sure to check out my video to see the whole process as well as the finished product! Plus, keep an eye out for the cake in my video! It’s on display in our newly remodeled store in Little Falls, MN.
Amanda,
Coborn’s, Inc. Pastry Arts Training Specialist
[...]
Read more...
November 21, 2017Thawing Turkey Safety Tips
With Thanksgiving just a couple days away, I felt it would be good to talk about some food safety tips that apply most appropriately to this time of year especially to that which we enjoy most on Turkey Day…..the turkey!
For many of you, you probably already have the turkey thawing in the refrigerator because you know that big bird will require several days to thaw. In fact, it is important to note, that for every 5 pounds of turkey there needs to be 24 hours of thaw time. So, if you have a 10 pound bird, it would be important to begin thawing that today! If you’ve missed that window of opportunity to thaw in the refrigerator, there are a couple other things you can do:
Thaw in cold water. Cold water thaws turkey (wrapped in leak proof plastic) as long as you change the water every 30 minutes. You will need to allow for 30 minutes of thawing per pound of turkey. *Remember, water should be cold not hot.
Thaw in microwave. More often than not, the turkey is too large for the microwave; however, if using one, it is important to begin cooking the turkey in the oven as soon as it is thawed. Also, it is best not to use the microwave for the entire cooking process as microwaves have such uneven cooking, this could pose a food safety risk in portions of the bird not getting full cooked.
Another option is to purchase several turkey breasts as these will take less time to thaw. I know for some this is not the best option as many look forward to enjoying the turkey legs!…..Although, many of our stores carry this option as well.
Cooking the turkey from frozen is not the best option, but it is an option, nonetheless. This option is only appropriate for oven cooking, it is not recommended to grill or deep-fry a frozen turkey. To determine the approximate cooking time for a frozen turkey, follow this guideline from the USDA (U.S. Department of Agriculture):
Take the recommended cooking time for a thawed turkey and multiply it by 1.5 for an unthawed bird. For example, if a thawed turkey needs to cook for 5 hours, then a frozen one needs to cook for 7 1/2 hours.
Most importantly, to ensure the turkey was cooked to the minimum internal temperature, a thermometer MUST be used. No matter how you choose to thaw the turkey. Check the temperature with a thermometer to ensure it reaches at least 165°F. Even if the turkey has a “pop-up” thermometer. 165°F is the minimum internal temperature for safety. More often than not the temperature of 180°F is used…just to be on the “safest” side.
Also, I would be remiss if I didn’t at least mention the stuffing. Especially due to the fact that many choose to cook the stuffing inside the turkey. It typically is best to prepare stuffing separate from the turkey. Loosely stuff the turkey just before you put it in the oven with ¾ cup stuffing per pound of turkey. And remember your trusty thermometer should be used to ensure that the center of the stuffing reaches 165°F. More often than not the ingredients used in stuffing are all items that could be eaten without a whole lot of heating, but when this is added inside the bird, we need to take into account that the stuffing is now exposed to the raw juices from the turkey. This then requires that the stuffing reaches at least 165°F to ensure it’s safety.
Enjoy this Thanksgiving Holiday with those most dear!
Eat Safe and Be Healthy!
Kim,
Coborn’s, Inc, Food Safety Coordinator [...]
Read more...

November 9, 2017Selecting Your Holiday Ham
Ham is the quintessential perfect centerpiece for your holiday table. Here are some tips on how to select, cook and serve a succulent, crowd-pleasing ham.
Select It: If you’re looking for convenience, a spiral sliced bone-in ham offers ease of serving. If not already spiral sliced, bone-in hams are more difficult to cut than a boneless ham but tend to be more flavorful. The leftover bone can be frozen and used to flavor a lentil stew, braised collard greens, and split pea or white bean soup.
Hams can either be fully cooked, partially cooked or uncooked. Fully cooked hams have been baked, cured or smoked and are ready to eat. Simply serve fully cooked hams chilled or at room temperature, or if you choose, heat the ham and apply a glaze (more on this below). For a partially cooked or uncooked ham follow the directions on the package label to ensure it’s cooked to a safe internal temperature of 140°F. Plan for about 1/4- to 1/2-pound per serving for a boneless ham and 1/2- to 3/4-pound per serving for a bone-in ham.
Cook It:To glaze a 7- to 8- pound spiral sliced bone-in ham, place the ham on a rack in a roasting pan filled with about 1/2 inch of water and loosely cover with foil. Let it stand for 30 minutes. Bake the ham at 325°F for 1 hour, then uncover, apply your favorite glaze and cook it 20 minutes longer, brushing with the glaze every ten minutes. Let stand 15 minutes before serving.
Another option for enhancing a spiral sliced bone-in ham is to apply a rub and then smoke it. Coat the ham with yellow mustard then sprinkle with your favorite pork rub and massage it into the ham. Heat a smoker to 230°F and place the ham flat side down in the smoker away from the heat source to prevent burning. Smoke the ham for 2-1/2 to 3 hours. Add additional flavor by brushing the ham with barbeque sauce during the last 30 minutes.
Serve It:Impress guests with a variety of flavors by pairing ham with dipping sauces like honey-mustard or horseradish. Complement it with garnishes of fresh fruits such as pineapple wedges, citrus wedges, and/or assorted berries, parsley sprigs or red kale. [...]
Read more...
November 5, 2017Introducing our new meal solution with wide variety of easy, quick and fresh meals.
Beef & Broccoli Stir Fry
Enjoy this popular restaurant dish in the comfort of your own home. This easy recipe for Beef & Broccoli Stir Fry includes tender slices of beef, a variety of colorful vegetables and Hoisin sauce.
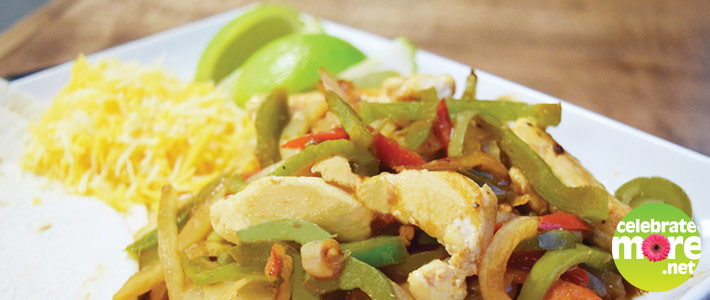
Chicken Fajitas
A South of the Border favorite! Delicious chicken fajitas with onion and bell peppers in a chipotle lime sauce. Top it with fresh pico de gallo, cheddar and jack cheese for a fiesta in 15 minutes or less!
Chicken Pad Thai
Delicious stir-fried rice noodles Thai-style topped with chicken, snow peas, carrots, peppers, onion and traditional Pad Thai sauce for an authentic flavor. We provide the ingredients, you provide the love.
Chicken Pesto Spaghettini
Experience the delicious taste of combining pesto sauce with chicken and veggies on a plate of whole wheat spaghettini.
Fettuccine Alfredo with Kale
Oh, Kale yeah! Spinach fettuccine and creamy alfredo with a perfect blend of chopped kale and sun-dried tomatoes. Top it off with parmesan cheese and a lemon squeeze.
Pork Yakisoba Stir Fry
This meal is brought to life with fresh yakisoba noodles, carrots, broccoli, cabbage, snap peas, kale and kicked up with sriracha teriyaki sauce. Spice up your life in just 15 minutes or less!
Next time you’re looking for something quick easy and fresh for lunch or dinner, you will find To the Table Meal Kits, Ready Chef Go meals and our Oven Ready entrees, all in our new Meal Solution Center in our Meat Department.
Enjoy!
[...]
Read more...

November 2, 2017In a world as busy as ours, time is precious and sometimes limited. Not everyone has the time to be in a kitchen every evening to prepare and cook dinner.
Meal is planned on the way home from work in the middle of rush hour traffic, on a soccer field, or in a gymnasium. Dinner planning can be frustrating and sometimes feel like a chore that you really find unappealing.
Well, Help is on the way! We now have a solution for you to steal back a few of those lost minutes and gain some needed time for you. We’ve introduced a new solution for those that need a quick answer for dinner or supper.
Fresh Meal Kit
“To the Table Fresh Meal Kits” are our answer to that million-dollar question, “What’s for Dinner Tonight?” We have put together several Fresh Chef Inspired meals and placed them in an easy to carry box. “To the table Meal Kits” are complete and ready to serve in just 15 minutes, all you need is a pan and cooking oil.
“To the Table Meal Kits” comprises of fresh ingredients, prepped and ready to place in the pan. A knife isn’t necessary. We have included easy to follow instructions that will walk you through the cooking process with ease.
Where to Find it
You will find these great dinner time meal solutions in our Meal Easy Solution Center located in our fresh meat case in our meat department. These great dinner options are our way of making life just a little bit easier for you.
In this section, we have many options to choose from. “To the Table Meal Kits,” “Ready Chef Go” microwaveable entrées, and Oven Ready meal solutions are all in our new Meal Easy Solution Center. Just look for the sign:
Next time you’re looking for something quick easy and fresh for lunch or dinner, remember our Meal Easy Solution Center. We have the answer to making your busy life just a little bit easier. We won’t disappoint you.
Kevin Connor,
Merchandising Specialist Team Manager for Meat and Seafood
Click Here for more blogs by Kevin C. [...]
Read more...

October 31, 2017Happy Halloween everyone! Tonight is the night when many will roam the streets and knock on doors yelling “Trick or Treat!”. There are several things to keep in mind to keep our trick or treaters safe on Halloween night from walking in a group, with a buddy or trusted adult to what type of costume to wear that will provide some warmth on this cold Midwest evening….brrrrrr – that is almost as frightful as Halloween can be! However, what I am going to offer today are some food safety reminders as they relate to Halloween, mainly on the topic of “food inspection”.
Safety Tips
Tonight everyone should have a “Food Safety Inspector” in the house.
Candy should not be eaten until it can be inspected back at home.
Eating a meal or a snack before trick or treating should help eliminate the temptation to snack on the goodies received before they can be inspected.
Candy should be inspected for pinholes or tears in the wrappers and any kind of discoloration or odd appearance. Here the old adage of “When in doubt – throw it out” definitely applies.
Ensure all treats are commercially made versus a homemade treat. *Homemade treats from trusted sources are certainly okay, but be sure you know who the creation came from!
Anyone with allergy concerns should always wait until items can be inspected and labels are reviewed prior to eating.
Don’t be shy – tell those providing the treats about the allergy and ask for something free of the allergen of concern.
For little ones, especially, parents should be mindful of those items that can be choking hazards: nuts, chewing gum, hard candy, etc. and remove them from their treat bag
And lastly, just a little related Halloween holiday humor…..What’s worse than finding a worm in your apple? Finding half a worm in your apple! On a serious note, with more and more people making an effort to give out healthy snacks, whole fruit is something to be cautious of as they can be easily tampered with. Like the homemade creations, just be sure it is from a person you know and trust. And then ensure it is washed before it is eaten.
After you have completed the duties good food inspector, enjoy a piece or two – you deserve it!
Eat Safe and Be Healthy!
Kim,
Coborn’s, Inc, Food Safety & Nutrition Manager, Registered Dietitian
Click Here for more articles written by Kim
[...]
Read more...

October 17, 2017
It’s Alive! Cakenstein!
The leaves are falling and the spider webbing is going up. Light your candelabra and prepare to serve up a scary good cake to your favorite ghouls and goblins. It’s… Frankenstein’s Monster! Well, make that his sweeter distant cousin, Cakenstein!
I will be using a ¼ sheet of cake and 2 lbs. of icing. You’ll a few pastry bags and round tips (size 8 and size 3) as well as food coloring, I used black, yellow, and green liquid gel.
In preparation of piecing our monster together, you’ll want to color your icing. From my 2 lbs. of white I put 4 oz. of white in a piping bag with a coupler. Then I scooped out another 8 oz. and colored it black. The remaining icing I colored neon green. I like my bright greens on the yellow side. I used a teaspoon of yellow liquid gel and 3 drops of leaf green. Liquid gel is stronger than the little droplet bottles you find in the spice aisle of the grocery store. You would need much more than I used to get the bright colors.
Now, a quick note before you start mixing! If you are new to icing a cake you make need a little more green than I used. I ended up with a small fist sized ball of icing left after icing my cake. If you are still battling the crumbs when you ice you may want to have an extra ½ lb. of green in the bowl to start with to give you more icing to work with. Or, just cut back on the white and black that you bag up to start with. I probably used half of the white and maybe half of the black. It’s just nice to have more than you need in the bag, it makes it easier to squeeze and you won’t run out half way through should you have oopses.
Alright, you’ve got the icing. You’ve got a cake. You’ve got the equipment, time to let the experiment begin! Ice your ¼ sheet cake with the lime green icing. You should have some extra icing left. Bag this up in a piping bag with a coupler.
I’m going to pipe his face using the coupler, no ring, no tip. Draw his brow in about the middle of the cake. Next pipe a nose, start from the tip of his nose with a round circle and then bring it upwards tapering off at his brow. Think of a large teardrop shape. Using the same bag finish off the green parts by piping his ears on the sides. One side is a “C” shape and the other is a backwards “C”. Next up, his hair.
Using the bag of black icing with a size 8 round tip, pipe his hair. I like to leave it as a bunch of straight lines with slight variations in the length. Think of piping fence posts, really close together, across his forehead. Carry the hair lines down the sides of the cake as well. For the top of his head where we won’t really see it, you can either keep piping lines or, my preference, smooth it out. Just fill in the space roughly and then use a small spatula to smooth it out. Why do I like that? It’s just less black icing on the cake. It’s still black, but it’s a thinner layer.
Okay, we’ve given him face parts and hair. Let’s add in some eyeballs. Using the white with just the coupler in the bag, no coupler ring or tip, pipe his eye balls. I like my scooted up against his brow. I think it gives him more character than two big wide awake excited eyes. But, maybe your Cakenstein is wide awake and happy to see you… you are the mad scientist, the choice is in your hands! After the whites you can use the black with the size 8 round to pipe in pupils.
Our monster needs a few more details. A size 3 round with the white icing is perfect for making stitches. I chose white to brighten up the cake and bring balance to all the black. Little white dots in his eyes will bring live to his expression. I gave mine a squiggly smile with black and a size 3 round tip. And he needed neck bolts, I piped them with the size 8 round tip in black. I liked the white, black, lime color scheme and didn’t want to throw in random gray on the side. A few little highlight lines in white and the bolts fit in well with the minimalist color scheme.
And with that, throw the switch and pull back the sheet! Cakenstein lives!
Amanda,
Coborn’s, Inc. Pastry Arts Training Specialist
Click Here for more blogs written by Amanda. [...]
Read more...
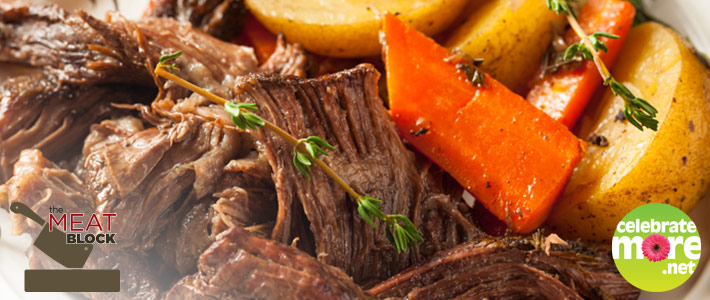
October 5, 2017Fall is here, and it is my favorite season of the year. I really enjoy the different colors and different aroma in the air when you walk outside in the morning. The changing colors of the trees and the farmers harvesting their fields means that winter is just around the corner. With that said, our cooking goes from the grill to the oven. The smell of comfort food cooking in the Kitchen on a cool fall day after working in the yard, collecting leaves, is another favorite aroma. Walking in the front door and that aroma of a Hearty Pot Roast that has been slowly cooking while I was working in the yard is hard to beat.
How to Buy Beef Roast
Now the hundred-dollar question, “What roast do I buy”? Well the choices are easy when you know what you want. When it comes to the roast, I choose the cooking method that I am using, and the type of meal that I am serving. If it is a special occasion, or if the amount of time is a factor, this will decide which Roast I choose
Beef Roast Cooked in the Slow Cooker or Oven
If I am cooking a Beef Roast in the Slow Cooker or in the oven and have the time to do this, I choose a roast that is from the front quarter usually the Chuck Roast or Arm Roast. These roasts are usually the best value in the Meat Case. These roasts work well with an onion, baby carrots, a stalk or two of celery, and enough potatoes to feed our crew. I season the roast and place it in the cooking vessel, add a cup or two of water or broth, add the vegetables and slow roast it so the meat is tender and flavorful when done. Adding the cup or two of water or broth should give you enough liquid to make a hearty gravy when the roast is done for the potatoes. These roasts will need the extra cooking time to break down the connective tissue that they have, and will give you the great eating experience.
Beef Roast Cooked Quick
If you are looking for a roast that can be cooked a bit quicker and will give you a good eating experience and still produce that Great Aroma. I choose a roast that originates from the hind quarter. The Rump Roast, Top Sirloin Roast, Sirloin Tip Roast, Tri Tip, Top Round and Eye of Round roast are a few choices that are proven winners. These roasts are cooked in an oven at a little bit higher heat and a shorter cooking time frame. I use a dry heat method and normally do not cover these when cooking.
I always use a meat thermometer when cooking this type of roast. I will remove the roast from the oven about five degrees before my desired doneness, and let the roast rest for ten to fifteen minutes before carving and serving. These roasts are great for a middle of the week treat when you don’t have the time to spend in the kitchen. I normally allow 25-30 minutes per pound of meat when cooking these roasts. A 3-4 lb roast should tale about 2 hours to complete. A baked potato or a favorite squash is a great side to serve with these roasts.
Beef Roasts for Special Occasion
Now a few of my special occasion Roasts that will keep them coming back for more!! These Roasts are proven winners and are always a hit with my family and guests. Our “Holiday Dreams” Boneless Ribeye Roast, Boneless Top Loin “Manhattan Roast” and Beef Tenderloin are roasts that are normally cooked at higher temperatures, 325-350 degree oven, and allow about 18-25 minutes per pound. These roasts also use the dry heat cooking method uncovered. I always use a meat thermometer when cooking these roasts and again remove them from the oven 5 degrees before my desired doneness, let them rest for another ten minutes and then serve. These Roasts are the Best of the Best and will always be a hit. Make sure to buy extra, second helpings are always asked for with these Roasts.
So, the next time that you plan a beef roast, our Meat Team will be ready to assist you with your selection. We will suggest options for you to choose. Be confident and try new seasonings on your selections. As with anything, the more that you become familiar with each cooking method, the easier and more rewarding the results will be.
Kevin Connor
Merchandising Specialist Team Manager for Meat and Seafood
Click Here for more blogs by Kevin C. [...]
Read more...
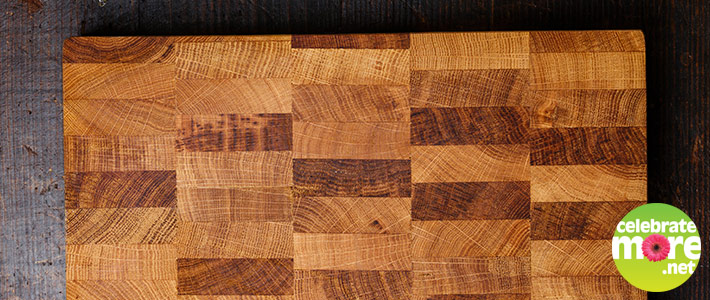
September 28, 2017
When we look at our options for cutting boards, wooden ones always seem to stand out as being a more stylish choice which bring a sophisticated look to our kitchen rather than plastic. However, one often thinks what is the best way to wash these cutting boards? They almost look too pretty to wash or questions like “will it ruin the wood if I wash it?” come to mind. Truly the cleaning of wooden cutting boards is no different than any other type of cutting board. All cutting boards should be washed with hot, soapy water, rinsed thoroughly with plain water and then either allowed to air dry or dried with clean paper towels. All types of cutting boards, including wood, can also be sanitized. To make a sanitizing solution, mix 1 tablespoon of regular liquid chlorine bleach (unscented) with 1 gallon of water. Do not soak the cutting board in this solution, rather pour it over the surface and then allow the cutting board to sit for several minutes. Follow this with a rinse of plain water and let air dry again or pat dry with paper towels.
Type of Cutting Board
Other things to keep in mind when purchasing a wooden cutting board is the type of wood. Hardwoods and bamboo are what you should look for. Softwoods are too porous and will harbor bacteria and be difficult to clean. Hardwoods like maple, oak, cherry and teak are good options. Bamboo, by far, is probably the best choice. Bamboo will absorb little to no moisture and is very resistant to scarring from knives more so than the hardwood varieties. Scarring of cutting boards is also very important to be mindful of, deep grooves in the board can be harborage areas for bacteria and can be difficult to clean effectively. Remember to replace any type of cutting board when it contains deep grooves or becomes extremely worn.
And last, but not least, I believe I covered this in my “Do I really need to use separate cutting boards?” blog…..The wisest choice is to use separate cutting boards for raw meat, fresh produce and bread items. If you remember, food safety is about building barriers and by having separate cutting boards for these items, you are reducing your risk of cross-contaminating one food with another. Effectively washing is the first step and using separate cutting boards just creates that extra barrier.
Until next time – Cook Safe and Be Healthy!
Kim,
Coborn’s, Inc, Food Safety & Nutrition Manager, Registered Dietitian
Click Here for more articles written by Kim [...]
Read more...

September 7, 2017Seafood is regarded as one of the healthiest options when it comes to proteins. It is recommended that we eat at least two servings or more of seafood weekly. Incorporating seafood into any of your meal plans is easy and enjoyable. Knowing that seafood offers many health benefits, it makes it easier to serve. At Coborn’s we take the time to source the best seafood possible. Coborn’s has a strong partnership with seafood suppliers who share our same dedication to selling fish from regional and global suppliers that we know and trust. We are committed to supporting only those companies who help restore our marine and coastal ecosystems and who build a more sustainable seafood market. Our standards are this high because we value the trust of our guests. We know that we earn that trust by being transparent and ethical.
Norwegian Salmon
I can say today, one of the choices for you to make when purchasing seafood at Coborn’s is easier when you choose Norwegian salmon. The Norwegian salmon that we sell is probably some of the best salmon that is sold in the world. Salmon is sold many places and can be sourced from many countries around the world. Why do we choose Norwegian salmon as an offering at Coborn’s? Norway’s cool climate along with cold, clean waters and deep fjords makes this area an ideal environment for raising and producing high quality salmon.
Not all salmon is created equal. Norwegian salmon is some of the best. Built on a heritage of respect for the sea and surrounding environment, Norwegians foster a deep respect for the natural environment, especially the sea. They take pride in extending the traditions of their ancestors in building a rich tradition of seafood and preserving this great natural resource for future generations. Over 37 million portions of seafood from Norway are served daily all over the world. Since first raised in Norway in the 1960s, farmed salmon has expanded rapidly in the last two decades and now accounts for 70% of all the salmon we eat.
Salmon is very versatile in the kitchen. I bake it, pan fry, and grill with very good results. When I take Norwegian salmon home, I usually buy a little extra because any that does not get eaten for dinner, makes a great addition to a fresh salad or a quick sandwich for tomorrows lunch. Seafood for many is an area that in unfamiliar in the kitchen in the Midwest. We were raised eating beef, pork and chicken. Until a person is comfortable with preparing any seafood or salmon we are wary of how to go about cooking it to perfection.
My favorite method of preparing salmon is on the grill. I have found that Norwegian salmon is so versatile that it can be seasoned with your favorite marinade or seasoning. I have used many different sauces and seasonings and the results have been favorable.
For me, Norwegian salmon is a favorite. It has a firm texture and deep rich buttery flavor that keeps me coming back for more. When I grill Norwegian salmon, I usually leave the skin on and use indirect heat when cooking. I try to time this based on the thickness of the fillet or steak. A good rule of thumb is 7-8 minutes per ½ inch of thickness. Using the indirect heat, I do not turn the salmon while cooking.
So, the next time you looking for something for supper, ask for our Norwegian salmon. Take it home, cook it like you would your favorite steak, pork chop, or chicken breast. Remember to buy a little extra, to get that second recommended serving of seafood, for lunch tomorrow. You won’t be disappointed.
Why is Salmon good for you
Salmon is an oily fish and rich in Omega 3 fatty acids. These acids go some way toward helping prevent heart disease. The Food Standards Agency (U.K.) advises consumers that salmon also provides an excellent source of vitamins A and D, and along with most other varieties of fish provides additional minerals in the form of iodine and selenium. Salmon does not contain high levels of mercury, regardless of whether it is wild or farmed salmon, and therefore is considered safe for pregnant and breastfeeding women to eat.
Awe-inspiring mountains, deep, crystal-clear fjords and a spectacular coastline that stretches for over 60,000 miles—Norway’s unique natural landscape creates the perfect home for some of the world’s most popular seafood. Built on a heritage of respect for the sea and surrounding environment, Norwegians foster a deep respect for the natural environment, especially the sea and its inhabitants. Grateful to have inherited such a plentiful environment, Norwegians feel they have a duty to protect these rich stocks for future generations.
Sustainably farmed Norwegian salmon delivers a clean taste and texture that comes from a slow, natural growth process and exceptional regulations to ensure safety. 37 million portions of Norwegian seafood are served worldwide every day, so it’s important that everyone knows about its provenance.
Kevin Connor
Merchandising Specialist Team Manager for Meat and Seafood
Click Here for more blogs by Kevin C. [...]
Read more...

August 3, 2017Set the date on your Calendar August 16th 2017, World Bratwurst Day!!! This little celebrated day should be a bigger event than what is currently is. These small but hearty sausages are a staple in many homes throughout the world. This day should be a time to get together and honor this small but delicious treat.
The origin of Bratwurst dates back to the early 1300’s in Germany. Bratwurst, referred to many in the USA as “Brats”, were popularized in the state of Wisconsin by German Immigrants who continued the heritage that their ancestors started. Each local butcher shop created their own secret recipe that was guarded and held close to the cuff to keep their customers coming back for more. Today, these recipes are still family secrets and are often boasted as the best in the World!!
At Coborn’s we take our Bratwurst serious too!! We know that Bratwursts are good, but we make them “Great”. We believe our Signature recipe is one of the best that can be found (another one of those Family Secrets that has been passed from generation to generation). Our Guests keep coming back for more and more of these hearty links. Our Signature Fresh Mega Bratwurst are produced with the finest cuts of lean and meaty pork. We finely chop the meat and add our special blend of spices and seasonings and place them in a natural casing to offer you the best possible eating experience around. One of these Mega Brats is big enough to feed the heartiest of appetites. We offer seven unique and tasty varieties for you to choose. From the Northern Minnesota inspired “Wild Rice Brat” to the bold and tasty Jalapeno Cheddar Brat, each variety offers a unique eating experience.
Grilling, baking, or panfrying these brats are good cooking methods. My favorite way to prepare these Mega brats is to give these links time to cook and to soak up a few drops of beer to accompany the flavor of these Great Links. I create what I call a “Bratwurst Hot Tub” on my Grill.
I start by placing my cast iron skillet on my grill and preheat the pan and the grill for ten minutes or so. I slice an onion or two, and a Green and Red Bell Pepper. I sauté the onion and pepper in the cast iron skillet with a tablespoon or two of butter. At the same time, I place the Bratwurst (any one of our seven varieties work well) on the other side of the grill and brown them. After browning the Bratwurst, I place them into the cast iron skillet with the peppers and onions, and add enough beer (a can or two) to cover the bratwurst. I then slowly simmer the brats for 45-50 minutes on the grill turning the brats a time or two to ensure that they get the needed moisture to keep them from drying. I have found that cooking the brats in this manner allows me time to relax and enjoy my company, while adding that something extra to these already outstanding Mega Brats. I serve the bratwurst on one of our Signature Fresh Bakery Bratwurst Buns, add some of the sautéed onions and peppers, and any other favorite condiment that you may have!!
Kevin Connor
Merchandising Specialist Team Manager for Meat and Seafood
Click Here for more blogs by Kevin C. [...]
Read more...

July 27, 2017
You can have your cake and eat it too. Or hot wings. You can have those and eat them too… dipped in ranch… with a cocktail – totally guilt free and cheaper than happy hour at your local bar! I’ve got a great Cauliflower Buffalo Wings recipe paired perfectly with Cashew Ranch Dip and a Honey Coconut Mojito Mocktail to wash it all down. All of these can be made 100% vegan and gluten free. You know, if you’re in to that sort of thing.
Cauliflower Buffalo Wings
Ingredients
1 head Cauliflower
1 cup Flour (use Rice Flour for gluten-free)
1 T. minced Garlic
1 tsp. Cumin
1 tsp. Paprika
1/2 cup Milk (use Almond Milk for vegan)
1/2 cup Water
Hot Sauce – your favorite brand will do!
Salt & Pepper to taste
Instructions
Preheat oven to 450 degrees F.
Wash and cut Cauliflower florets into bit sized pieces.
Mix Flour, Garlic, Cumin, Paprika, Milk, Water, Salt and Pepper in a small bowl until the batter is moderately thick.
Evenly coat Cauliflower florets with batter and space them out on a lightly greased baking sheet.
Bake for 15 minutes, flip cauliflower over, bake for another 15 minutes until all sides are nice and crispy.
Evenly coat florets with your favorite Hot Sauce and serve!
You probably have most of these ingredients sitting at home anyway, and you can get a head of cauliflower much cheaper than a pound of chicken. If you don’t have Cumin or Paprika, don’t worry about it, just make sure they’re all coated with your favorite hot sauce.
Now let’s make the dip!
Cashew Ranch Dip
Ingredients
1 cup Raw Cashews
1 T. minced Garlic
1/4 cup finely chopped Green Onions
1/4 cup Water
Juice from 1 Lemon
Salt & Pepper to taste
Instructions
Soak cashews in a bowl of water for at least 15 minutes, drain and add to food processor.
Add remaining ingredients to food processor and blend.
Add additional water if needed for dip consistency.
3.4.3177
You can find Raw Cashews in the Bulk Foods area at your local Coborn’s, they are a little softer and easier to blend, and you can get just the amount you need.
Now to wash it all down.
Honey Coconut Mojito Mocktail
Ingredients
1 Cup fresh Mint leaves
2 Cups Coconut Water
1/2 Cup Honey
Juice of 2 Limes
6 Cups Sparkling Water
Ice
Instructions
Muddle Lime Juice and Mint until it is aromatic.
Add Coconut water and stir in Honey.
Add Sparkling water and give a final stir making sure everything is mixed well before topping pitcher off with ice.
3.4.3177
You can have this drink all summer long if you grow your own mint! It is really easy to grow and very forgiving, my mint plant has died twice now, but still manages to spring back to life when I remember to water it.
These recipes are a great way to spend a nice summer day at home with friends and family, enjoy!
Brandon
Coborn’s Inc. Web Designer [...]
Read more...

July 18, 2017Summer, a great time to grow your frosting flower garden. And with so many colors and varieties you’ll never have to make the same cake design twice. I thought we could focus in on a specific flower family, the daisies, and explore with inspirations from nature. Let’s try 5 different ways of piping daisies, from a cute and quick style to a detailed eye catcher. I’ll be piping my flowers on large cookies but naturally you can pipe these on any dessert that needs decorating.
Bubble Daisies
A good place for beginners to start is with the bubble daisy, but don’t think that this flower is only for the inexperienced. Even the pros know this cute little guy is great for a young child’s cake or for a bold, brightly colored, style. Using a very fine tip you can create a delicate pattern for a wedding or sweet details on a baby’s cake. While this flower isn’t exactly a recreation of something you’d find in a garden, it’s a classic decorating option to have up your sleeve.
We’ll start with a round tip, the size is up to you. I usually use somewhere between a #6 and #8. For a tiny flower you could use a #2 or #3 or load up a #12 for giant petals. For my bubble daisies today I am using a #8 round.
To create your flower you are going to draw petals from the outside of the flower to the center. You want to pipe a basic tear drop shape. Position your tip, squeeze, pull the icing towards the center of the flower, and ease off the squeeze to create the tapering effect. 5 or 6 petals per flower will be sufficient. You could do more than 6 but it loses that simple groovy feel. I, myself, like the space between the petals. It can get a little cluttered feeling otherwise. But hey, it’s your flower and you are the boss in your kitchen. One important tip to keep in mind is your flowers do not need to touch in the middle. Bring the tips in to the center, have them tickling each other a bit, but don’t feel like they need to connect. This can create crowding and a frosting pile that will cause you flower center to unnaturally rise up to the heavens.
To finish your daisy add the center dot of icing with another round tip, I just use a tip of equal size but one size up or down really won’t hurt anything. Pipe your dot and there you go! I added leaves to my flowers using a round tip as well. It’s the same teardrop shape we used to make the petals but now we pipe from the flower outwards for our leaf shape. I like to do these leaves instead of using a leaf tip since the style matches better. They both have a cartoony/informal feel versus adding in a realistic looking leaf with an informal flower.
Simple Black Eyed Susan-Side View
A long title for a quick little flower. This one is very similar to the flower we just made, the main twist being this is a side view of a flower. This one is a little something different to throw in that creative curveball. If you look up photos of black eyed susans this one takes inspiration from later in the season when the petal droop down a bit, leaving the centers stretching up to the sky.
Start by drawing a few stems for your flowers. I used a size 3 for my stems. Next we’ll add the petals in a golden yellow or yellow. Piping these is done the same way we piped the bubble daisy. A #5 round, or somewhere in that area, would work well. This time we want all the petals to be hanging down as shown. 4 or maybe 5 petals would be plenty to fill the space. Try to make these petals a little longer and thinner than the petals we piped for the bubble daisies.
The centers are made with some brown frosting. Using a #5 round tip I began with piping a dot and then just giving it a little more fullness to the top of the flower that is facing the sky. The shape should be more of an oval or lopsided dot than a perfect circle.
Add in some leaves or grass at the base of your stems. These flowers can also be cute when done as a border by drawing gently curving vines and then adding your black eyed susans and some leaves to that. You could also use the same technique to create a coneflower by switching to a shade of light pink instead of the yellow petals.
Shasta Daisy
Let’s try our hand at something a little more realistic looking. Using the classic white daisy, a Shasta, let’s up the piping skill. Now, the number one thing people have a problem with is keeping round flowers in a round shape. Things tend to get squarish or triangular when piping large, mutli-petaled flowers. I’m going to use a little trick to create a guide. Using a decorating tip I make a circle on my frosted surface. The small circle in the middle shows me where the middle will be and helps with keeping that round shape. Just ever so lightly touch the frosting with your circle tool, it doesn’t need to be deep.
We’ll begin with piping the petals. Start at the outside of the flowers and pipe your petal in towards the center using a round #5. Instead of just squeezing out the petals with thick to thin I’m going to complicate it just a bit. Start with a medium thickness and move towards the center… BUT give the bag a squeeze shortly after you start to move the tip to widen the petal before tapering away to a slender petal at the small guide circle. So, in terms of thickness that’s: medium thick medium thin. Or, if I was standing over your shoulder I would be saying “Ok, and squeeeeze, MORE SQUEEEEEEEZE, let off! Taper it! Ease off the squeeze! Ahhh… good. Again!”
Now, you might want to practice that a few times on a surface that isn’t your finished product. Once you feel like you have it you can start on your flower. I piped four petals at North, South, East, and West and then started piping in each quarter section. By breaking it into 4 quadrants this will help keep your petals going straight out versus a spiraling or curved effect. Just as we did with the bubble daisy, you don’t need to go all the way to the center, we will be putting something there when you get done piping.
To finish our flower we’ll add a yellow center. A #10 tip will make a nice circle and then I like to add in the little dot texture with a #2 or #3 for a little more realism.
Gerbera Daisy
Well, now that we are really well practiced let’s up the ante to a detailed wonder of a flower. I’ll be making an orange gerbera daisy but they come in so many colors you choose from an endless supply of hue inspirations from Mother Nature.
For this flower I’ll be using a mum tip, or the U shaped tip. Mine happens to be a #79. We’ll start with making some circle guidelines like we did for the Shasta daisy to keep us in a circle. For this flower let’s do a small inner circle and a large outer circle. Using an outside line (made with a cookie cutter, or a bowl or a lid) we should have a nice round flower.
This time we’ll be piping from the inside out. Holding my tip at a right angle to the decorating surface, the rounded part of the tip is facing the outside of the flower, I’ll pipe line form center circle mark to just a hair past the outer circle mark. It’s just a simple line, over and over. I’ll do the 4 petals at North, South, East, and West to help keep things headed out in straight lines. You’ll notice that there are gaps between our petals at the outside of our circle and that’s ok. We are going to do a second layer of petals that will cover those in-between spaces.
Pipe a second row in the same manner. Inside circle to outside. Stagger the petals to fill in the open spaces. Also, try to end these petals with a little lift at the end by raising your tip as you end the petal.
For the center we’ll pipe a brown center similar to what we did for the Shasta, a big dot covered in smaller dots for texture.
Now, I’ll switch to a slightly darker shade of orange and a #4 round tip. We are going to pipe those tine petal at the center of a gerbera, the ones that would eventually grow into big petals. Make two circles of little spikes around the brown center. My first row is out about a ¼ inch from the brown center, mostly laying flat. Pipe a dot and pull out a bit of icing, creating a slender spike shape. The next row is close to the brown center and I try to pull these up at an angle as I pipe. The finishing touch will be some dainty yellow dots between the orange and the brown. A #2 round will work well.
Bonus Round, Putting petals in Perspective
Using tiny wildflowers from the daisy family, fleabane, let’s touch on how to play with perspective. Why? Because we don’t always need to do our flowers from the top down view. Let’s shake things up and expand our horizons! I’ll be piping my flowers and stems with #2 rounds and for the centers I’ll use a #4. On my cookie I pipe stems but I’ll just breakdown the flowers by the view. Petals I’m piping from the center of the flower to the outside with a taper at the ends.
Bud: A flower that hasn’t opened yet, not too hard. Draw you petals all upwards and from one, flat, imaginary bottom line. The overall shape would be a square or maybe an onion type shape depending on your preference. Pipe a green base to the flower as shown. Thick where it connects to the petals and thin where it connects to the stem.
Upwards: This flower is facing the sun and the petals are curving upwards. This is similar to the bud where they are all upwards from an imaginary baseline. But now they fan outwards. Literally think of a handheld fan you would unfurl at a fancy ball. Now draw that with petals. Next you want to add a yellow center. This should be in a thin oval shape. To finish this flower we will switch back to our petals and draw a few short petals from the base of the oval center and upwards, in front of the flower center. The photo will show this better than I can explain it.
Flat: This is a flower that you are viewing from the side. We will be working in a circle, but with varying our petal length. Let’s imagine our flower with North, South, East, and West lines running through it. Pipe your petals from the center outwards. The petals on the E and W sides should be the longest. The petals on the N and S should be short and stubby. If it help draw a petal or two at each direction with the appropriate length. Then fill in petals in the between spaces, tapering the petal sizes between each cardinal direction from long to short. The center of this flower will also be an oval.
Front: You got this. Draw your petals radiating outwards from the center. A nice circle with even lengths of petals. Add you circular center and you’ve got yourself a flower.
Mixing sizes and views of dainty flowers in with a few big flowers would give a nice natural feel to a frosting arrangement. How pretty would this be in a wildflower bouquet design for a country themed bridal shower or for your garden loving grandma?
That’s a lot of flower options! Once you start playing with colors, maybe mix your daisies in with some roses, you’re sure to impress with your expanded skills. Pastels for spring, neons for summer, jewel tones for fall and crisp frosty colors for winter, you’ll be pleased with how these 5 ideas can expand your cake designs.
Amanda,
Coborn’s, Inc. Pastry Arts Training Specialist
Click Here for more blogs written by Amanda.
[...]
Read more...
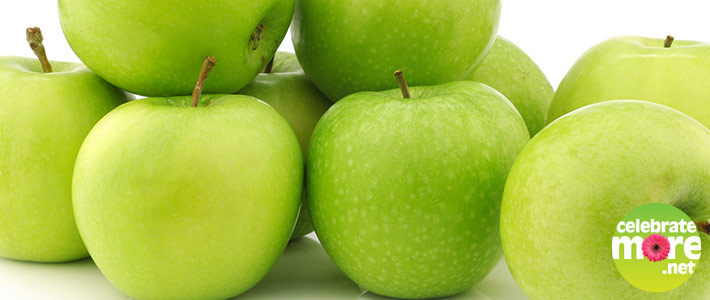
June 29, 2017Granny Smith apples are one of the most deliciously versatile apples the world have ever known! Kids love them fresh out of hand (Not to mention covered in caramel candy) while chefs and bakers love their citrus tart flavor, which is ideal for a wide variety of recipes. They are not only tasty but they are quite the social apple. According to our research, there are more people tweeting about Granny Smiths than any other variety!
Heritage
Granny Smith apples were discovered as a chance seedling by Maria Ann Smith in the 1860s. Smith discovered the seedling in a compost pile on her orchard in Australia. The exact parentage of Granny Smith apples is unknown, but it is believed to be a relative of the French crab apple––the variety that Smith was growing in the area where she found the seedling. The seedling bore apples that she eventually took to market. Granny Smith apples were first introduced commercially to the United Kingdom in the 1930s, but they weren’t introduced to the United States market until Washington growers began commercially selling them in the 1960s. Our partner Superfresh Growers produces their Granny Smiths in the Wenatchee and Yakima regions of eastern Washington.
Flavor
This medium to large-sized variety is green when growing and transforms to shades of red, pink, and yellow, along with their vibrant green hue when ripe. The round, thick-skinned apples are often speckled with faint white lenticels. Their flesh is bright white with a tart, acidic, yet sweet flavor and a crisp texture. Granny Smith apples are firm, with strong tartness resembling a lemon. Many believe they even flaunt lime and grapefruit elements.
Usage Ideas
The juicy variety with bold sweet and sour bursts is an all-purpose apple. They are slow to brown when cut, making them great for eating fresh, crisp, and cold. You can add diced Granny Smith apples to salads and salsas, or slice them up and serve them on a cheese board or fruit platter. Slice Granny Smith to layer with ham and brie in a sandwich on crusty baguette bread. Their high acidity and ability to hold their shape and zesty flavor when cooked makes them a perfect choice for baking into sweet or savory pies, tarts, or meat pastries. Here is a great recipe for a delicious fruit and grain breakfast salad. They can also be poached or frozen. Their sweet-tart flavor is a great addition to soups, smoothies and sauces.
Sprinkle chopped Granny Smith apple over a bowl of cheddar soup, or incorporate the apples into the base of the soup by making this cheddar soup with Granny Smith apples. The mouth-watering apple, with its crisp, tangy flavors can be added to savory bread stuffing, risotto or potato pancakes, and can even be made into applesauce.
The tang of this apple contrasts well with slightly sweet foods such as winter squash or honey-baked ham. The tartness of this apple pairs well with rich seafood, such as crabmeat or shrimp. Another way to prepare Granny Apples is to cube the apples and toss them with cubed acorn squash and olive oil, then roast them and serve as a side dish to pork chops or roasted chicken.
Health and Nutrition
Granny Smiths just like all other apple varieties are good for you heart, teeth and overall health. According to a recent study eating an apple or two a day may reduce heart disease risk factors. The study showed a 40% reduction in blood oxidation of low density lipoprotein LDL otherwise known as “bad cholesterol” and a reduction in the amount of plaque and inflammation in artery walls. Other health benefits of apples includes aiding in the reduction of blood sugars, appetite control, protection against cancers and safeguarding of the lungs.
Granny Smith Kale Smoothie
This lovely bright green smoothie is super nutritious thanks to the Granny Smith apple and kale. It’s also super sweet tasting without any refined sugar. It’s a win-win! And did we mention it is the perfect recipe for your Healthy St. Patrick’s Day celebrations! Throw a banana in the freezer the night before for a dreamy cool breakfast treat.
Granny Smith Kale Smoothie
Ingredients
¾ cup unsweetened almond milk
1 Granny Smith Apple (unpeeled) cored and quartered
2 large Lacinato (aka Dino) kale leaves with stems removed
1 frozen banana – If you don’t have time to freeze a banana, toss a few ice cubes in with a fresh banana.
A few shakes of cinnamon
Garnish with fresh pomegranate seeds
Instructions
In a powerful blender combine almond milk, banana, apple, kale, and a few shake of cinnamon. Blend at high speed until super smooth. Pour into glasses and garnish with pomegranate seeds.
3.4.3177
Granny Smith Snickers Salad Recipe
Ok let’s get one thing straight. We are not recommending you replace your breakfast cereal with this delicious treat. We know it’s tempting, but trust us, your spin class instructor will smell the Snickers on your breath and punish you with extra hills!
So when is this recipe approved for use? How about any time after 12 p.m.? (Not enforced during holidays and Sunday brunch)
Granny Smith Snickers Salad
Ingredients
6 Snickers® Candy Bars
4 Granny Smith Apples
1 16oz Cool Whip tub (room temp)
½ cup milk
1 Packet Instant Pudding Mix
Caramel Topping (usually found in the ice cream aisle)
Instructions
Add ½ cup milk, Instant pudding mix and cool whip then whisk until powder is combined
Core and dice apples into bite size pieces
Chop Snickers to the same size as apples pieces
Add apples and Snicker chunks to pudding mixture
(put some Snickers pieces aside for topping)
Refrigerate for at least 1 hour
Drizzle caramel topping and sprinkle remaining Snicker on top before serving
3.4.3177
Apples truly live up to their famous adage about keeping the doctor away! [...]
Read more...
June 20, 2017Hello again everyone! I was asked to talk to you today about flies and whether or not a person should be worried if a fly lands on their food. Well……it is not a very pleasant subject because as much as we would like to dismiss them as just pesty little buggers that like to ruin our outdoor food fun, they really are capable of carrying various pathogens (the bacteria that can cause disease). It is for this reason we do not want flies landing on our food.
But, rather than focusing on how disgusting flies truly are, let’s talk about some tricks we can try to keep flies away from our picnics.
Pick a more secluded area…..Plan picnics in an area away from public areas and parks where there is a tendency to be a lot of food and garbage cans around. Flies are naturally attracted to areas where there is a lot of food and decaying food.
Make it difficult for the fly to get to you….Find a spot that has a soft gentle breeze. This will at least add a bit of resistance to their flight and hopefully make it difficult for them to land on your food!
Take it indoors……this does not need to mean literally indoors, but possibly use a screened tent when in the park or while camping to keep these pests out.
Use a homemade repellent…….Has anyone heard of the trick with an apple and cloves? This is news to me and I would love to hear if anyone has tried this before or any other trick like this. As I was researching fly repellents today, I came across this on wikiHow, again, I’ve never tried it, but I actually think I might! It stated to take an apple and poke whole cloves into it all the way around. Evidently, flies do not like the smell of cloves. It makes me wonder if a clove scented candle would work as well….
Hopefully one or a combination of these tricks will work to keep the pesty flies away from your picnicking enjoyment! Enjoy the summer!
Kim
Coborn’s, Inc, Food Safety & Nutrition Manager, Registered Dietitian
Click Here for more articles written by Kim [...]
Read more...

June 15, 2017Pairing wine with food should be a fun endeavor especially when it comes to summer grilling. Balancing flavors is a good starting place where you don’t want one element to overpower another like a Cabernet might do to shrimp skewers or steak might do to Pinot Grigio. Texture can be important too and is demonstrated well by a wine with tannins cutting through a fattier piece of meat. As I once heard, another way to think of pairing food & wine is to treat wine like another condiment. Try to create a similar effect to squeezed lemon on seafood or pesto on a steak or salad. Finally if all else fails pick a sparkling wine like Prosecco to pair with grilled food as those bubbles can pair with nearly anything. With all that said, here are some old & new favorites I will be enjoying this summer…
Grilled Vegetables with Rodney Strong Charlotte’s Home Sauvignon Blanc
This wine is fresh, crisp & delicious. This is a 100% Estate grown wine and shows cases awesome citrus fruit and tropical characters with enough delicacy to compliment lighter grilled veggies but enough backbone to work with some of more difficult one’s to pair like Brussel sprouts or asparagus.
Grilled Seafood with Domaine du Tariquet Cotes de Gascogne Classic
This is the perfect wine for summer with its refreshing character and intense aromas of citrus and tropical fruit notes with floral hints. This also makes it a great choice to pair with seafood off the grilled. Think the aforementioned Shrimp skewers or other grill worthy white fish.
Grilled Barbecued Chicken with Primarius Rose
We can always argue about the chicken or the egg but often I also hear white of red with chicken. How about if we say both and offer Rose. The spicy and fruity notes of your barbeque sauce paired with the juicy, tangy and cherry flavors of this Rose are off the charts.
Grilled Steak with Marietta Arme
Certainly a steaks cut, aging technique and accompanying sauces can change the pairing suggestion but generally steak with an intensely flavored wine is always a good bet. Cabernet is always a good choice but Cabernet based Blends can provide boldness and richness too like this one from Marietta.
Barbecue Pork Ribs with Herald Alexander Valley Zinfandel
Any excuse to break out Red Zinfandel is fine by me but with BBQ’d Ribs it is a must. The red berry flavors, spice and smokiness of the Zinfandel coupled with the flavors of the ribs are absolute dynamite.
Cedar Plank Grilled Salmon with Cline Sonoma Coast Pinot Noir
Pinot Noir is not always at the top of the list for “grill” wines but I love it with salmon prepared in this manner. The deep red color of this wine is impressive for 100% Pinot Noir and notes of strawberry and cedar in this wine make a perfect partner for this salmon preparation style. Another great grilling partner to this wine if you are so inclined is leg of lamb.
Happy summer!
Mike H.
Assistant Liquor Division Manager
Coborn’s, Inc.
Click Here for more blog articles written by Mike. [...]
Read more...

June 1, 2017Grilling and Barbecue are sometimes thought of the same cooking method by most. Unless you are a pro on the patio or in the backyard, you may not know the difference. Have no worries, I am here to help a little with that and assist you with choosing the right meat for the right application.
Both methods can and will use the same equipment that you may have, the difference will be the meat or seafood that you choose and the temperature of the flame. Both cooking methods are popular forms of cooking for intimate settings or big social gatherings. And, there is something about cooking over a live fire that makes me feel good. I normally get no complaints when I fire up my grill, whether Grilling or BBQ, the appreciation at the table is always seen by the smiles on my guests faces, and not to mention the dish washer appreciates fewer pots and pans as well.
Grilling
I will start with Grilling. It is the oldest form of cooking known to modern man. It is probably one of the most preferred forms of cooking, and some will say it offers the best eating experience. Grilling uses high heat and direct flame. This type of cooking will usually cook meat at a faster rate and and you should expect to eat in 30 minutes or less.
Grilling uses leaner, small, naturally tender cuts of meat. These cuts come from the Rib, Loin, and Sirloin of beef and are often in Steak form. Seafood, ground meats, as well as Boneless Skinless Chicken, and tender cuts of pork are also great choices for Grilling. Grilling, done at a higher temperature, locks the juices in the meat, and by using those cuts of meat it will offer the best eating experience. Grilling in this High Heat/Direct method requires attention, and usually will require you to turn the meat. This same high heat will produce a flare up or two, so you will need to pay close attention to the grill and your meat. These flare ups however are not always a bad thing, these offer aroma while cooking(my neighbors are always asking “what’s for supper”) and flavor at the table.
Barbecue
Barbecuing, on the other hand, in my opinion is an art. Every time that I BBQ, I find and look for ways to make it just a little better the next time. Either I adjust the Seasoning and Rub, or possibly the marinade, and even the wood that is used to make it just a little bit different. Across the nation, many people compete to be the best and to own the rights to say their BBQ is the Best!! Rib competitions are happening more and more, and the interest in this form of cooking is growing in popularity in backyards across the nation. BBQ is the form of cooking that uses indirect heat at a lower level. Low and Slow is the term that one uses when you BBQ, you cannot be in a hurry when you BBQ. BBQ will take several hours to complete as the meat used will take longer to make tender.
BBQ often uses wood as the heat source, although gas can be used effectively if temperatures are monitored throughout the cooking process. BBQ lovers savor the taste of the meat when this method is used. Normally the wood that is used will give the meat a distinct flavor, from apple wood to pecan, cherry, and mesquite the results are different with each that is used. Some will even blend the wood used for their own distinct taste. Many will guard their secret recipes and formulas to make certain they keep the bragging rights that theirs is the “Best”!!
BBQ often will use less tender cuts of meat, meats that are normally a better value and will often feed larger crowds are the choices many make when looking to BBQ. These cuts often have more connective tissue and take longer to cook, this process makes them tender and mouthwatering. These inexpensive cuts normally come from the front quarter of beef and pork. Bone-In Ribs, pork shoulders, and beef briskets are the most common cuts used. Whole turkey, turkey breast, whole chicken, and skin on chicken parts are also good choices for barbecuing. The seasoning or marinades used, are also a big part of barbecuing. That special blend of spices and sugar, that certain tablespoon of fresh garlic or minced onion rubbed into the meat to give it your signature flavor will be enjoyed by many. I take the time to let these seasonings absorb into the meat for hours prior to placing them on the grill, this normally produces favorable results for me.
So, the next time that you set out to use your backyard or patio, our teams are ready to assist you with your selections. Dabble in using different choices of meat and seafood, different cuts of ribs. Be brave and try new seasonings and rubs on your selections. As with anything, the more that you become familiar with each method, the easier and more rewarding the results will be.
Kevin Connor
Merchandising Specialist Team Manager for Meat and Seafood [...]
Read more...

June 1, 201710 Best! Food on a Stick
About 1.9 million people visit the Minnesota State Fair in St. Paul each year, which is the largest in the United States. In addition to butter sculptures, fun rides, and gigantic hogs, this annual celebration is known for its unusual yet delicious foods on a stick. If you can’t make it to the fair this summer, recreate your own unique snacks on a stick at home with these ten creative recipes!
1. Loaded Tots on a Stick
Preheat oven to 425°F. Cook Tater Tots® in single layer in microwave oven 15 seconds; cook bacon in single layer in microwave oven 30 seconds. Cut bacon slices crosswise in half; wrap 4 tots with 4 half pieces bacon. Alternately skewer wrapped tots with 1/4-inch slices jalapeño, ending with wrapped tot. Repeat to make additional skewers. Bake skewers on cookie sheet sprayed with nonstick cooking spray 25 minutes.
Heat 6 oz. pale ale in small saucepot over medium heat 3 minutes; whisk in 8 oz. Velveeta® cheese, cut into small pieces, 1 teaspoon each Worcestershire sauce and 1 teaspoon Dijon mustard. Reduce heat to low; cook until sauce is smooth and heated through, stirring frequently. Serve skewers drizzled with cheese sauce along with mixture of sour cream and green onions for dipping.
2. Caesar Sliders on a Stick
Preheat oven to 400°F. Remove crusts from bread slices; cut into 2-inch square pieces. Brush with olive oil; bake 3 minutes or until toasted. Spread 1 piece toast with Caesar dressing and skewer, followed by tomato slice, mini burger, small piece of romaine lettuce, slice of Parmesan cheese and 1 piece toast.
3. Apple Pie on a Stick
Preheat oven to 375°F. Line 2 baking pans with parchment paper. Heat 2 tablespoons unsalted butter over medium heat, until golden brown. Add 1/4 cup brown sugar, 1 teaspoon cinnamon, 1/2 teaspoon each freshly ground nutmeg and salt, and 2 teaspoons lemon juice to butter; stir to combine. Add 1 pound peeled, cored apples, diced into 1/2-inch pieces, stirring to coat. Cook apples for 5-7 minutes over medium heat until tender. Remove apples from heat and let mixture cool to room temperature (you can put them in the fridge to speed up the process). Mix together 1 slightly beaten egg and 2 teaspoons water for the egg wash. Roll out one 9-inch pie crust dough 1/8-inch thick. Cut out 18 rounds, about 2-1/2 inches each, and place on prepared pans. Using a pastry brush, lightly dab egg wash around the edge of each round and then lightly press one lollipop stick about halfway up each round. Place 1 tablespoon of apple mixture in the center of each round. Re-roll out dough and cut 18 more rounds, about 3-inches each; place over apple mixture and crimp to seal the edges. To vent the top, cut a decorative shape or prick with a fork. Place pans in freezer for 10 minutes to set. Remove trays and brush each pie pop with egg wash and sprinkle with turbinado sugar. Bake 20 minutes or until golden brown. Let cool.
4. Strawberry Shortcake on a Stick
Preheat oven to 350°F. In large bowl, combine 1 box white cake mix, 3/4 cup Greek vanilla yogurt, 2 egg whites, and 1-1/3 cups water. Mix until smooth and pour into a greased 9 x 13 inch pan. Bake 20-25 minutes or according to directions on the box. Cut stems off of 2 containers of strawberries and halve them if necessary to create uniform sizes. When cool, cut shortcake into 2-inch cubes or circles. If desired, cut horizontally in half and top with jam. Alternate strawberries and shortcake cubes on a skewer (about 3-4 each per stick). In a small glass bowl, melt 1 bag white chocolate chips in the microwave for about 2 minutes, stirring every 30 seconds. Once fully melted, pour chocolate into a plastic bag, seal, cut off the corner and drizzle chocolate over kabobs. Place in fridge to set.
5. Deep Fried Snickers on a Stick
Heat oil in deep fryer to 375°F. Mix 1-1/2 cups all-purpose flour, 4-1/2 teaspoons baking powder, 1 tablespoon each granulated sugar and brown sugar, and 1/8 teaspoon salt in a small bowl. In large bowl, mix 1 egg, 1/2 cup each water and 2% milk. Add dry ingredients to wet ingredients and whisk until moistened. Dip Fun Size Snickers® candy bars into the batter and coat evenly. In batches, carefully drop batter-coated candy bars into oil a few at a time. Fry until golden brown, flipping as needed to cook evenly. Remove bars using tongs; drain on paper towel-lined plate. Insert wooden skewers into the candy bars. Decorate with melted chocolate or powdered sugar, if desired.
6. Pizza on a Stick
8 ounces Italian sausage links
1 medium white onion, cut into 1-inch pieces
2 cups cherry tomatoes
1 large green bell pepper, cut into 1-inch pieces
2 ounces pepperoni slices
8 ounces whole mushrooms
1 tube pizza dough
1-1/2 cups shredded mozzarella cheese
1-1/2 cups pizza sauce
Preheat oven to 400°F. Spray a baking pan with nonstick cooking spray. In a large skillet, cook sausage over medium heat until fully cooked. Remove from skillet; drain on paper towel-lined plate. After cooling, cut the sausages into about 20 one-inch pieces. Using 10 metal or wooden skewers, alternate sausage, onion, tomatoes, bell pepper, pepperoni and mushrooms, using about two of each item per skewer. Unroll pizza dough on a lightly floured surface. Using a pizza cutter, cut strips of pizza dough lengthwise, about 1-inch wide. Starting at the pointed edge, pierce dough and spiral wrap it around the skewer, allowing the ingredients to peek through. Wrap the end of the dough around the other end to fasten. Repeat for all 10 skewers. Place skewers on prepared pan and bake for 10-12 minutes until pizza dough is golden brown. Remove from oven and sprinkle with mozzarella cheese while still hot. Serve with a side of pizza sauce.
7. S’mores on a Stick
Crush graham crackers in a plastic bag to make 2 cups; place in shallow bowl. Melt dipping chocolate according to package directions, adding 1-2 teaspoons of shortening to thin the chocolate, if necessary. Put a large marshmallow on each skewer; dip into chocolate. Roll in graham cracker crumbs. Let set until chocolate hardens.
8. BLTs on a Stick
Preheat oven to 400°F. Line baking pan with parchment paper. Cut 1 package bacon into thirds; place on prepared pan. Bake bacon for 15-18 minutes. Remove from oven and place on paper towel-lined plate to drain. Flatten several slices of white bread using a rolling pin and use a cookie cutter to cut small circles. Do the same with Boston lettuce leaves and thinly slice cocktail tomatoes. Assemble the mini sandwiches starting with the bread, spreading it with mayonnaise. Layer lettuce, tomato and bacon. Skewer each sandwich with a cocktail fork.
9. Meatball Sub on a Stick
Preheat oven to 375°F. Line two baking pans with parchment paper; set aside. In bowl, combine 1 pound lean ground turkey, 1/2 cup Italian breadcrumbs, 1/2 cup grated Parmesan cheese, 1 tablespoon each dried oregano, dried basil and dried parsley, 1/2 teaspoon crushed red pepper flakes and 2 cloves minced garlic. Form mixture into 1-inch meatballs. Using 1 can Pillsbury® Original breadsticks, thread each skewer with one dough stick, alternating with meatballs, ending with the dough. Make sure to separate dough and meatballs by about 1/4-inch so the meatballs bake through and the dough has room to expand. Bake 20 minutes or until the meatballs are cooked through. Remove from oven and sprinkle each skewer with 1-2 tablespoons shredded mozzarella cheese. Place back in oven for 2-3 minutes until cheese is melted. Serve immediately with warm marinara sauce for dipping.
10. Spiral Potatoes on a Stick
Preheat oven to 325°F. Thread mini Yukon gold potatoes onto long wooden skewers. Place on cutting board; using a sharp knife, carefully make a slice around the potato at a slight angle. Keep rotating the potato to continue the slice. Work your way all around until you get to the bottom of the potato. Then, carefully fan the potato out onto the skewer. Place spiraled potatoes onto a baking pan. Drizzle with vegetable oil, salt, pepper and any other seasonings of your choice. Bake for about 25 minutes. Larger potatoes will need to be baked longer. Remove from oven and they’re ready to eat.
[...]
Read more...

May 30, 2017
I think we can relax, it would seem snowy days are behind us. Let’s celebrate flip flop weather with some fun summer cupcakes. Now, normally, you would just load up a bag with a big frosting tip and ice away. But I’d like to present something a little different. Let’s flip the cupcakes over!
The following five ideas all have the same thing in common. They are iced like tiny cakes! You’ll want to have a small spatula, I’m using a 4” spatula. It’s also nice to have a large cake icing tip. You can just zip around the outside in one swipe. You’ll need something to put your cupcake on, I used both small paper plates and cupcake liners. And it doesn’t hurt to have a turntable for this. If you don’t have an actual decorator’s turntable you could also just dig out your lazy susan if you have one.
Start by removing the liner from your cupcake. Your guest don’t need the additional fiber. You may need to take a little slice off the top so your cupcake can sit level and stable. If you are going to use a cupcake liner under your cupcake you’ll want to use a fresh liner, I like the foil ones since they are a little stiffer. Flatten out your liner and place your cupcake on it, bottom side up. You can use a little dollop of icing to hold it in place. Then you ice the cupcake like you would a tiny cake, hence why I use tiny tools. The cake icier tip makes this process super easy. In one spin you can wrap the outside in icing. You only have one little seam to blend in. The first few times you try this it may feel awkward and a little roly poly. But once you figure out the right touch you’ll be good to go. Hint, if your cupcakes are giving you problems put them in the freezer for a few minutes. They’ll be firmer and easier to ice. Now, on to the fancy stuff!
Ladybug! How cute would these be on a little tiered cake stand or sitting at table settings for the kids at the party? I iced my cupcake in red and then piped on the rest of the details. If you can do dots and lines, you can do this. You could also do pink ladybugs. Or why not a rainbow assortment of fun, summery, beetles? That would be great for a little bug explorer’s birthday!
What about an undersea adventure party? Here is a cute little octopus idea. I used a small dessert plate for a base this time. Pipe the tentacles first, then it’s up to you how to proceed. I, myself, plopped that cupcake, bare, in the center and then iced it on the plate. It takes a little bit more care, but it’s doable. Especially if you are using that large cake icer tip. You could also ice them and then move them to the plate, but there might be some fingerprints left behind as you lift and position. Again, freezing them will make the transfer process easier. You should be able to lightly touch them and position them without leaving marks on the frosting. Once the main body is in place it’s just a matter of adding a cute little face. If you want to make him more squid like I would put the eyes further apart, almost on the sides of the head. Then use a coupler to pipe a little cone of frosting on his head. With a little extra smoothing you would have the nice pointed shape of a squid body.
If you want to be on the beach versus in the waves you can also make these cute little sandcastles. I iced my cupcake and then rolled it in crushed graham crackers. You’ll want to have the crackers crushed and ready. After icing your cupcake immediately roll the cupcake in the crumbs to get the best stick-to-it-ivness. Once they are coated in crumbs you can add on the little finishing touches. I used pieces of graham crackers to give my cupcake that classic castle look on top, and to make a little draw bridge door on the front. They would also be very cute with little colorful paper flags on toothpicks on top. I completed my cupcake by placing it on a dessert plate with more graham cracker “sand” and a few bubble gum pearls.
While not specifically summery there is no avoiding the popular unicorn trend. As an adult who had a unicorn obsession as a child I’m overly happy to oblige. So, here is the hot summer trend, but tiny. If you have seen the large cakes with a unicorn horn and a rainbow piped mane then you will recognize this cupcake. It’s basically a scaled down version. Ice your cupcake in your preferred color, add a face, horn, and rainbow mane. I used a mini marshmallow, cut in half on the diagonal, for the ears. If you are wondering how to make that horn stand up I’ll tell you a secret. I piped the frosting horn around an uncooked spaghetti noodle. Being a pro I was choose to pipe a coil of icing, using a size 4 tip, around the noodle.
If you are starting out on your cake journey I would recommend starting with this other technique. Use a round tip that the noodle will fit into with a little room to spare, probably about a size 5, depends on your noodle. Put the noodle in the cupcake, slide the tip down the noodle from the top, with the noodle going into the tip. Start at the base of the noodle and starting gently squeezing. As you squeeze you will slowly draw your tip upwards. Every 1/8” or so you’ll want to give a little a little downward push with the tip to create the ridges in the horn. You might want to practice it a few times before you do it on your unicorn.
And finally, the ultimate summer activity, eating a tasty, melty, ice cream cone. I put my cupcake on a line, but you could do little plates as well. It depends on how you want to display, transport, or the age of the eater. Start with icing your cupcake in your chose ice cream color. I then piped a little extra of the color at the bottom for that melting ice cream look. (Don’t forget some sprinkles!) Next we will add the cone, but you might want to hold off on that if you are driving around with these. They stayed on just fine for me when they were on the table, but I wouldn’t trust them not to fall off if being jostled in a car. Now, for an extra surprise grabbed some more sprinkles and mini marshmallows. You could also use little candies or chocolate chips. Fill your cone, about half way with fun little treats. Tilt it on it’s side, not enough to spill, but enough that we can stick it on the cupcake. Hold you cupcake in your other hand and tilt it at an angle towards your ice cream cone. Now, fuse the two together. You’ll want it to be either on the top or at a slight angle. Too far leaning and your cone will tip off. Keep that in mind as well when filling your cone. If you pack it full of chocolates they are much heavier than marshmallows and the weight may pull the cone off. Now, for the fun part… Sit the party folks down, hand out those cupcakes and watch the fun of the surprise spilling out!
Amanda
Coborn’s, Inc. Pastry Arts Training Specialist
Click Here for more blogs written by Amanda.
[...]
Read more...
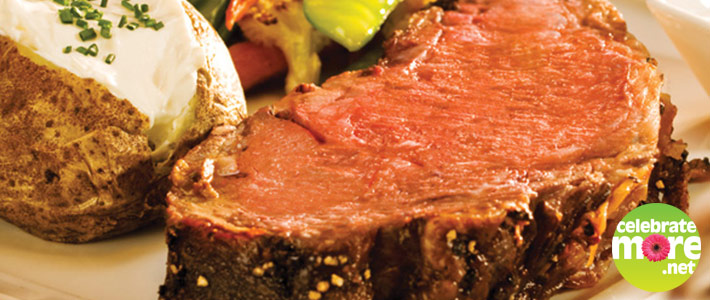
May 4, 2017In the past, the only time a person ate Prime Rib was at a very special occasion, or you went out to a fine restaurant. Now, you don’t have to wait for that special occasion, we have Prime Rib ready for you everyday. In fact, we have even made it easy for you, we fully cook our Prime Rib to make your time in the kitchen minimal and easy to give you more time relax and unwind after a busy day or week. Our Fully Cooked Prime Rib will deliver a top-quality eating experience every time.
We start with the best center cut Ribeye, carve trim and season it. We then Slow Roast it to perfection, the standard that is followed at any fine restaurant. This attention to detail locks in the natural goodness and flavor to offer you a great eating experience.
Oven or Grill Ready, just take it home and place it in the Oven or on the Grill and in minutes your Prime Rib Dinner will be plate ready. It will take you longer to make your salad and vegetable.
Don’t wait for that big Holiday or a big gathering to enjoy Prime Rib. You can pick up one or two portions and enjoy any day of the week with ease and convenience of just warming up the Prime Rib. Don’t forget the rest; serve with a side of AuJus, your favorite salad, Baked Potato, and a Garlic Toast.
A meal fit for a king, or better yet you and your family.
Kevin Connor
Merchandising Specialist Team Manager for Meat and Seafood
Click Here for more blogs by Kevin C. [...]
Read more...

April 19, 2017You don’t need a unicorn by your side to create the latest slice of cake magic, the rainbow iced cake! From little kids to grownups who are young at heart this vibrant cake will light up any room at a party. It looks tricky, but with a steady hand and a few piping bags this cake can be pulled off at any skill level. I’ll be making my cake full on rainbow magic style but it can easily be made up with pastels or school colors or in a monochromatic stripe. The nice part about this technique is you don’t need airbrushing equipment to create a cake with blended frosting colors.
The mechanics are the same as far as stacking and icing your cake. If you can ice a cake plain white you can pull this off too. Where the technique changes is how you apply the icing. I used one piping bag per color of rainbow stripingStarting at the bottom pipe a line all the way around your cake. Next, switch colors and repeat. Keep going until you reach the top of your cake, striping the side with each of your colors.. Try your best to make each layer the same width. For an easier time blending the sides and the top of your cake together I would recommend having your top horizontal strip color be the same and the color on top of your cake.
Once you have your sides base iced it’s time to move on to the magical step. Here is where you wave your magic cake wand and see what emerges from the controlled chaos.
I like to use a large, smooth, cake comb for my sides. It’s like a bowl scraper but stiff and has a nice crisp edge. It’s good to have a tool that is as tall as your cake since you will need to go around your dessert in one motion.Smooth the sides or your cake as you would a one color cake. Make a full rotation being careful not to move your cake comb up or down. This could smear the colors out of their layers. After 2 or so passes your frosting should be blended together in one smooth layer of icing.
Clean off the edges of your comb before you do the top of the cake. Ice the top as normal, bringing the edges in towards the middle and smoothing out the top. If your top isn’t the same color as the side you can see how this would be a tricky step. You could do a border on the edge to cover where they meet up in this case but I wanted to keep the border minimal for this design.To top off my cake I wanted rainbow dollops of frosting. This can be a little tricky but has a great effect. You already have all your colors in piping bags, you’ll just need one more piping bag. Roll your empty bag down low and use the bagged colors to fill it. Fill it in sections, piping in strips of color. Keep rolling the bag upwards and filling it in sections. Now when you give the bag a squeeze a full spectrum of color will come out all at once.
To finish your rainbow cake you can go elaborate or simple. In this example, I kept it simple with sprinkles scattered across the top. You could also go bigger with a little piles of cookie chunks and candies. To go full magical unicorn an ice cream sugar cone would make a cute horn.
Now, away you go, mystical secret frosting powers are not to be wasted! Try your hand at creating your own rainbow cake!
Amanda
Coborn’s, Inc. Pastry Arts Training Specialist
Click Here for more blogs written by Amanda. [...]
Read more...

April 6, 2017Not all ham is created equal. Our Four Brothers Signature Bone-In-Ham is a ham that does not take a backseat to any other Ham.
We start with the best ham, remove the shank and trim it lean to the bone. These standards are what you would expect to find at some of the finest restaurants in the nation. We then blend a mixture of hardwoods and smoke it slowly to perfection. A perfect balance of Smoke and Old Fashioned meat experience is what makes our ham the Best. This is part of our Rich Heritage that can be counted on with every ham that we produce.
Our Old Fashioned approach to our Four Brothers Bone-in-Ham began many years ago when we opened our first smokehouse. Our Guests have come to trust that when they place one of these hams on the table, there are not many leftovers when the meal is finished. Those hams are hearty, deliciously flavored, and guaranteed to make your meals memorable; it will keep your family asking for more.
These same great Old Fashioned hams are also available Spiral sliced for the convenience of going from the oven to the table. Just another way to add that extra special touch to any occasion.
Place one of our Four Brothers Old Fashioned Premium Bone-In-Ham on your Easter dinner table, you wont be disappointed.
Kevin Connor
Merchandising Specialist Team Manager for Meat and Seafood
Click Here for more blogs by Kevin C. [...]
Read more...
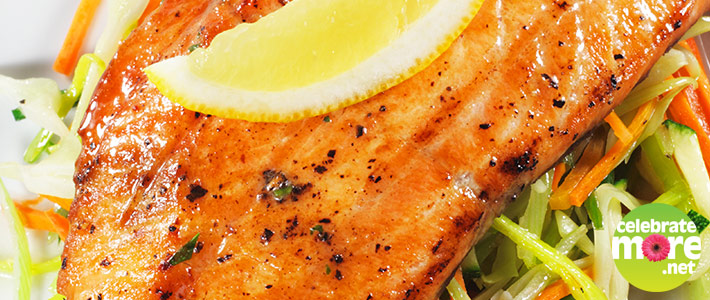
March 2, 2017Our Meat Departments are not just your destination for Fresh Meat, but also the choice for many as their Seafood Destination too.
Where we get it from
We have a great Seafood Supplier that is one of the best in the Upper Midwest. They are a supplier to many of the Best Fine Seafood Restaurants in Minnesota, North Dakota, South Dakota, and Western Wisconsin. They have Fresh Seafood flown in daily from many countries all around the world. They are a responsibly sourced company that takes pride in making sure that the seafood we supply to you our Guest, supports those companies that are committed to making sure that our marine ecosystems stay sustainable to provide Seafood for the many generations to come.
We keep it fresh
We take the Seafood that is flown in daily, and have it delivered to all of our locations. We order many times a week to make sure that the Seafood you choose is as fresh as possible. We know that by doing this, the Seafood on your table is as fresh as possible. Our standards are this high, because we value the trust that our Guests expect each and every day.
Our variety
The variety and selection of our Seafood is always changing. We try to keep the offerings constantly changing with the many different seasons for Fish and Seafood around the world. From the Salmon that is harvested in the cool deep waters in Norway, Cod that is caught off the shores of Alaska, to the Hawaii Mahi Mahi. We take pride in knowing the Seafood we offer is different and exciting. If there is a favorite that you don’t see in our Seafood display, or a certain fish that you would like to try. Just ask any of our Meat Specialists and we will do our best to try and get it for you. We also have a variety of seafood entrees that will save you time. These selections are ready for you to place in the oven or go right on the grill.
We feature Fresh Flight Seafood because we love that our Fish is so fresh, it will taste like you caught it that morning.
Kevin Connor
Merchandising Specialist Team Manager for Meat and Seafood
Click Here for more blogs by Kevin C. [...]
Read more...

February 21, 2017Apples help boost Brain Power!
It’s no secret that people who are the healthiest among us enjoy a diet rich in fruits and vegetables. Health experts everywhere agree that we should be eating more for our better health. Over the years research has shown us that some foods can help prevent heart disease, cancers, high blood pressure, and a wide variety of other more minor ailments. Now, health experts are finding that some of these “Superfoods” can even increase brainpower. There is a whole category of “Brain Food”. Pretty cool right!
Apples are one of the foods that health experts say will help you think clearly, boost your memory and of course contribute to overall good health. There is of course the old adage, “you are what you eat” and “an apple a day keeps the doctor away” which certainly still holds true today. Berries, cherries, oysters even curry are ranking high among the foods that help boost your brainpower.
But what makes the apple top this list?
Well, apples contain a certain group of nutrients and compounds that could help protect the brain from the type of damage that triggers neurodegenerative diseases like Alzheimer’s and Parkinson’s. Flavanoids called quercetin have been show to protect the brain from oxidative injury.
In addition to boosting brain power apples also help build strong teeth, promote heart health and give you energy! What an amazing fruit! You can explore more on the apple section of our site and find your favorite variety. If you need help finding an apple you like, have questions or just want to say hi, let us know in the comments below.
Apples helps develop STRONG TEETH!
Yes there are even more reasons to eat apples! For one they help develop STRONG TEETH!
In addition to brushing the flossing regularly, your diet can have an effect on your pearly whites. A healthful diet provides the minerals, vitamins and other nutrients that are essential in maintaining healthy teeth and gums. Did you know that apples are referred to as nature’s toothbrush!
Eating apples can help develop strong teeth because they stimulate the gums and increase saliva flow. Saliva decreases mouth decay and washes away food particles which helps reduce the amount of cavity causing bacteria. Apples also contain vitamins A and C that helps promote gum health.
Other healthy ways to promote healthy teeth include leafy green vegetables and crunchy raw vegetables like celery, carrots, broccoli and cauliflower.
Hope you enjoyed the tip! Keep eating your apples!
Apples helps have a HEALTHY HEART
Did you know? Apples are good for your heart!
According to a recent study, eating an apple or two a day may reduce heart disease risk factors. The study showed a 40% reduction in blood oxidation of low-density lipoprotein LDL otherwise known as “bad cholesterol” and a reduction in the amount of plaque and inflammation in artery walls. Other health benefits of apples include aiding in the reduction of blood sugars, appetite control, protection against cancers and safeguarding of the lungs.
Apples truly live up to their famous adage about keeping the doctor away!
Click here for more eat healthy blogs!
[...]
Read more...
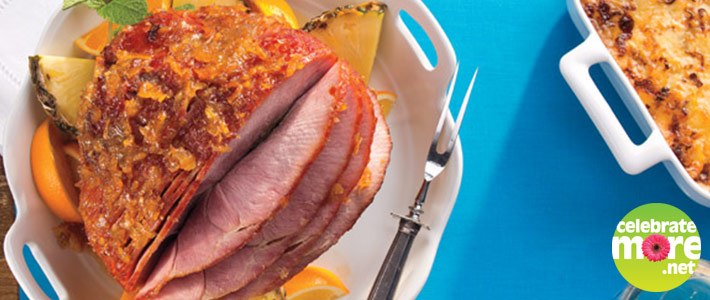
February 2, 2017What a Ham!
Ham is a classic centerpiece for the Easter holiday. Spice yours up by trying our Spiced Orange or Pepper-Peach glaze on your ham. To learn more tips on planning, cooking and storing your ham, check out our FAQs or ask your local Coborn’s Meat Department expert for more information.
How do I Glaze a Ham?
About halfway through baking, remove ham from oven. With sharp knife, lightly score outside of ham, making parallel 1/2-inch-deep incisions in crosshatch pattern. Brush with glaze and return ham to oven. Brush with additional glaze every 15 minutes.
How long can I store my ham?
Unless otherwise specified, refrigerate ham in its original packaging for up to 7 days. Leftover cooked ham should be refrigerated within 2 hours of cooking and kept refrigerated for up to 4 days.
How do I prepare a “pre-cooked” ham?
When heating precooked hams, you should add a liquid to the baking dish to guarantee a moist end result. Bake ham at 325°F for 12 to 15 minutes per pound. Using a glaze will provide additional flavor.
What’s the difference between “bone-in” and “boneless” hams?
Bone-in hams contain the butt-end and the lower portion of the leg, and are cured, smoked and typically sold in smaller portions. Some boneless hams contain the whole muscle, and others are formed from fresh boneless ham meat that is reformed into a characteristic ham shape. Boneless hams are easier to carve, while bone-in hams tend to be more flavorful and are harder to cut.
Can I freeze my ham? If so, how long?
For the best quality, avoid freezing leftover ham as it will change the flavor and texture. If freezing is necessary, wrap ham in a moisture-proof cover and freeze for up to 2 months.
How much ham should I plan for per person?
Plan for 1/4- to 1/2-pound per serving for a boneless ham and 1/2- to 3/4-pound per serving for a bone-in ham.
What can I do with the leftover ham bone?
Don’t toss the leftover ham bone. You can freeze the bone and use it later to flavor a lentil stew, split pea or white bean soup, or braised collard greens. [...]
Read more...

February 2, 2017Sugar, Sugar: 4 Sweet Wedding Cake Trends
Wedding cakes have become more than just simple white-tiered confections with a bride and groom cake topper; they have transformed into unique creations that include modern design elements and distinct, creative patterns. No matter which trend you prefer, Coborn’s expert cake decorators can provide you with a wedding cake that will meet your expectations. If you’re planning a wedding this spring or summer, be sure to set up a consultation at your local Coborn’s bakery at least four to six months in advance of your big day. When you meet to discuss ideas, bring with you photos, the wedding invitation, color scheme and any other items that reflect your personal style.
Whether you prefer a round, square or sheet cake, we can take any trend and create the perfect centerpiece for your special day. Or, if you choose another creative approach instead of a cake, like cupcakes or a donut tower, Coborn’s can help make your dessert unique. Read on to get a taste of some popular wedding trends that may inspire you to create your own picture-perfect wedding cake.
1. Glamour
Color Scheme: Trending color schemes for these shiny yet elegant wedding cakes are gold, silver, copper, pink and other bright and lively colors. Many glamour cakes possess stunning metallic gold and silver tiers. Metallic can be incorporated subtly throughout the cake, or it can be entirely metallic. Some couples are so in love with this trend that they include metallic fruit toppings as well.
Design Elements: Glamour cakes can possess extravagant components or delicate touches. They can feature a variety of fancy flowers, branches, pearls, sugar crystals, beading, sequins and ribbons. These cakes are usually in multiple tiers and each tier can be prepared in a different size and color to give them a glitzier look.
Flavors: A glamour cake can take on many flavors; however, mainstream flavors like red velvet, champagne, coconut, golden almond, buttercream, lemon, strawberry and yellow are most popular.
2. Layered
Color Scheme: Layered cakes are comprised of tiers (typically three) that appear the same on the outside, but offer an element of surprise with a different color, flavor and filling for each inside layer. These cakes are often white or a neutral color to allow the distinct colors on the inside to stand out.
Design Elements: Flowers and natural elements such as leaves, grape vines or delicate branches are regularly chosen to decorate these cakes. A unique cake topper is a great accent for a layered cake as they tend to have a plain design allowing for a more extravagant finishing touch.
Flavors: The flavors in a layered cake can balance one another or they can be distinctly different, giving guests a unique experience when they taste each layer. Try fillings and flavors like yellow cake and vanilla cake with fudge filling or strawberry cake with blueberry filling.
Tip from Coborn’s Expert Cake Decorators: Feel free to mix and match your flavors. Each tier can be unique along with any sheet cakes you may order. Set up a consultation with your chosen bakery and ask about our many flavor and filling options. While many couples choose marble since it is considered a crowd-pleaser don’t be afraid to express yourself through your taste buds. Wouldn’t confetti cake be a fun surprise? Or how about lemon cake to match your yellow flowers?
3. Boho
Color Scheme: Boho cakes contain varying natural hues — typically blues, greens and beiges with complementing bright colors such as red or pink. Others may possess an array of eclectic colors and patterns that are inspired by various cultures.
Design Elements: Boho cakes are known for their bold wildflowers, textured frills, vines, leaves, lace and elegant tiers that convey a casual, lighthearted and carefree spirit. These cakes can also include candles, feathers or ethnic designs and beading to add a decadent touch. Some even incorporate flower crowns onto their cakes that are also worn by boho brides.
Flavors: Popular boho cake flavors include buttercream, vanilla, marble and carrot cake. Fresh berries can top the cake to complement the buoyant Bohemian spirit.
Tip from Coborn’s Expert Cake Decorators: For brides on a budget there are a few cost-saving options. One option is to choose a smaller tiered cake for your wedding party and immediate family members, then order several sheet cakes for your guests. Or, if you have your heart set on a 5-tiered showpiece, consider having a few of the largest tiers be Styrofoam forms instead of cake. The “fake cake” tiers will be added at a discounted price and no one but you and your baker will know.
4. Rustic
Color Scheme: Common color schemes for rustic wedding cakes include beige, brown, green, blue, copper and hues of red or orange. A rustic cake is best with natural colors that accent the outdoor elements often surrounding the cake.
Design Elements: Simple and elegant, rustic cakes incorporate a variety of country-esque elements such as Mason jars, burlap, succulents, lanterns, pinecones, flowers and other natural items. An intriguing way to present these cakes is by placing them on a wooden slab to enhance that country feel.
Flavors: Popular rustic cake flavors include chocolate, buttercream, red velvet, carrot, coconut, lemon and warmer flavors like pumpkin spice.
Tip from Coborn’s Expert Cake Decorators: Gone are the days of flipping through a book of cakes and picking A, B, or C. While bakeries still have cake books for you to browse we certainly are open to custom designs. Feel free to mix and match sizes and patterns. The best thing you can do is show your decorator the collection of wedding cakes you’ve been putting together. Once we know what you love we can build a cake to suit you and your budget. Also, remember to bring color samples to your consultation for the best color match results. [...]
Read more...
January 26, 2017Valentine’s Arrow Donuts
Your sweetheart will feel the love when they are hit by these cupid’s arrow donuts. These are so simple and fun you’ll want to make a whole tray full! All you will need are a few simple items:
• Cake donuts
• Donut Holes
• ½ lb of buttercream
• Stir sticks, straws or skewers
• Whipped Cream (optional)
•Strawberries (optional)
•Powdered Sugar (optional)
•Sprinkles (optional)
Frosting Donut Heart
The process of building your cupid’s arrow donut is the same no matter what you top it with. First, you can either split a donut hole in half or just shave off part of a donut hole to make a flat spot and then use 2 donut holes for your heart.
Next you’ll want to trim your cake donut into a heart shape. I spun my donut around a little looking for any spot that seemed a little pointier, that became the bottom for my heart. Trim your donut with a sharp knife to create the pointed part of your heart. It should look somewhat like the corner of a square.
The next cut is on top. Cut out a triangle wedge from the top of your donut, centered above the angled bottom you just created. After I cut my triangle out I shaved the edges a little to round off and blend into the curved part of the donut. You should end up with a mostly heart shaped donut.
I used a stir stick, like the kind you use for your morning coffee, for my arrow. Simply insert the straw into your donut on one side and out the other. Be gentle with this step. I like the stir stick because it’s skinny and passes through the donut and the donut holes more neatly.
Grab your donut holes and put one hole on each end of the stir stick. I found that one you add icing to your donut holes there is a chance they will become top heavy and flip around on the stick. You may want to do the decorating and additional topping the plate you’ll be eating it from. But, if you are careful, it is manageable to move the donuts around from a prep area to your serving plate.
Color your icing and bag it up. I used a size 6 round tip to draw on some details to the arrow. I piped the little feathers at the back of the arrow and then drew the head of the arrow on the opposite side. You can draw the head of the arrow as a triangle or make it look like a little heart.
There are a few ways to finish off your heart donut. One way would be to use the frosting to pipe the outline of a heart. This option makes sure your sweetheart gets the message. Speaking of messages, if you are feeling brave you could use a size 2 or 3 round tip to write a short message to your valentine.
Powdered Sugar Donut
I also finished one of my donuts with a simple sprinkling of powdered sugar and did a little variation on the arrow. Instead of using donut holes I used a large strawberry. Cut the leaves off of your strawberry and then cut your strawberry in half from top to tip. One half we’ll use as is and the other half will be sliced into 3 pieces, giving you 3 half-moon shapes. Slide the 3 pieces on to the stir stick with the smallest piece closest to the donut heart. Leave a little space between the pieces, this is now the feather end of the arrow. The other strawberry half goes on the stir stick as the head of the arrow, smallest end pointing away from your donut. Whatever arrow you do end up choosing remember the pieces may rotate as you skooch them around and feel free to trim your stir stick or straw to the right length, I gave mine a few snips here and there to change the length of my arrow.
Strawberry Chocolate
For an extra breakfast treat grab yourself some whipped cream or whipped icing. Pipe a big ol’ pile of that stuff on your donut and added strawberry pieces and chocolate sprinkles. It’s Valentine ’s Day, you can have dessert for breakfast if you want to!
Have fun creating and customizing your cupid’s donuts, your valentine will be so surprised at your delicious craftiness. And remember, you should to make one for yourself too! [...]
Read more...

January 5, 2017Hi, I’m Kevin. I have been part of the Coborn’s team for over 30 years. I am lucky to hold the current role as Merchandising Specialist Team Manager for Meat and Seafood. I truly do have a passion is Meat and Seafood. I am fortunate enough to be able to assist our guests with selecting their meal solutions and have the privilege of leading our outstanding meat teams to do the same in our many locations.
When I am not at work I enjoy time spent with my family, cooking, watching the many sports that our children play, and the great outdoors. I am excited to now be blogging for Coborn’s so I can help educate you on the products and services we offer in our meat department, share recipes, ideas, tips and more every month. So I hope you come back and check out “The Meat Block” the first Thursday of each month.
Our Full Service Meat & Seafood Counters
For my first blog I would like to talk to you a little about our full-service meat cases that we offer. Whether serving two or twenty, our service meat and seafood counters are your one-stop-shop, that offers meal solutions for all occasions. Breakfast, Lunch and Dinner.
Wide Variety of Meats
Our great teams of meat experts put together one of the best displays of meat and seafood for you to choose from every day. Did you know that if you prefer a special cut of meat, our team will cut it for you right then and there. Don’t be afraid to ask, that is what they are there for. However we always have a complete line of steaks, chops, bratwurst, and Four Brothers gourmet beef patties available for a quick stop.
Ready Cook Entrées
We understand that many of our guests have very busy lives so we strive to have fresh, never frozen options for you with out ready-to-cook entrées. From the gourmet encrusted chicken, stuffed chops and roasts, to the bacon wrapped top sirloin, the options are endless. All of these entrées are prepared fresh in our meat department every morning, now that’s what I call fresh!
Come talk to us, we don’t bite!
Our local meat teams take pride in what they do and are always anxious to help you plan your next meal. Please take the time to introduce yourself and don’t be afraid to ask any one of our meat specialists for that quick suggestion on how to make that next steak or roast to perfection. Always, feel free to ask our butchers to cut that extra thick steak to your liking. We do the little things to make sure your life a bit easier.
Kevin
Merchandising Specialist Team Manager for Meat and Seafood
[...]
Read more...

September 29, 2016Put some creep in your cupcakes this Halloween with these spider treats! To create this critters you’ll need cupcakes, frostings, chocolate sandwich cookies with chocolate filling, malted milk ball candies, and black licorice.
Icing the Cupcakes
I used orange buttercream for my cupcakes. I usually plan on using 1 and ¾ lb. of buttercream when I ice a set of 24 cupcakes, using a star tip. If you pick up 2 lbs. of white you could color most of it your preferred shade and then save a bit of it for making black and white details. I also prepared my black licorice ahead of time by cutting into smaller strips to get nice, scrawny, spider legs.
Creepy Crawly Licorice Legs
Start with your iced cupcakes. Each one will get 8 legs. I put the legs on first instead of trying to jam them in under the cookie. Lay out the legs, 4 on each side. Nestle them into the frosting to keep them in place.
Cookie Body
After your legs are in place you can set a chocolate sandwich cookie on top of them. Position a little towards the back of the cupcakes, this will leave you a little room to place the head on the next step. You can place a dot of frosting to help hold it in place if the cookie isn’t quite making enough contact. If you stuck your spider legs down into the frosting there should be enough buttercream in the middle to make the cookie stick.
Candy Noggin
Now for the head. Use the malted milk ball candy as his noggin, attaching it to the front by sticking it in the frosting. I drew little faces on my spiders with my reserved portion of black and white frosting.
Extra Creepy
To go that extra mile, try drawing little skulls on your spider backs, or a “boo!”
The best part of these little treats are that you get cake, candy, and cookie all in one dessert. Kids and grown-ups alike will be happy to help you control your pest population by chowing down on these creepy critters!
Amanda
Coborn’s, Inc. Pastry Arts Training Specialist
Click Here for more blogs written by Amanda. [...]
Read more...

August 30, 2016While browsing cake photos in the vast world of the Internet, I kept coming across these glow in the dark cakes. Vividly glowing cakes in neon colors! A crazy awesome party with the cake acting as a beacon of birthday light in the center! Giving off light so bright you could read a book by it!
Well, of course I had to try this out. I did a little poking around and found a few ways that bakers are making their cakes glow. We’ll try and go about this in a somewhat scientific manner, as in, gather supplies and try and light it up!
The first thing I was seeing was people putting a layer of disco dust on their cakes. No thanks. Not me. Disco dust isn’t actually food, it’s just really finely ground up glitter. I know it’s not going to cause me serious harm in small doses, but I really want to stick to food magic that is 100% edible.
The next wonder ingredient I came across was tonic water! Holy Phosphorescence Batman! This stuff you can pick up in the soda aisle glowing amazing well, bright blue! I saw lots of people dunking their iced cupcakes in a mixture of piping gel and tonic water. We’ll give it a try.
I also know from my trips to the roller rink that neon colors and whites love to glow. So I made myself up some pretty colors of frosting and got ready to light up the bakery.
Now, to really give the full picture, let me say this, I’ve tried this project 3 times. The first time I got out the gels and the tonic water and the colored icings and plugged in my lamp with a blacklight bulb. Completely underwhelming. First of all, you can’t use a cheap bulb. It was just a regular bulb dipped in purple. It did nothing to the frosting. Ok, correction. It made the white frosting look purple, just like a red bulb would have made it look pink. All and all it was very disheartening. Where is my laser frosting show?!
After all this and being pumped to eat glow food I wasn’t ready to hang up my apron yet. Time for a new bulb! I picked up a 6” blacklight tube bulb, loaded me and my frostings into a dark room and hit the switch… success! Mostly. The tonic water took on a blue glow and the white frosting had a strange, faint, pinky glow on the edges. And of course my shoe laces and shirt lit up and there was a dance party. However even with the progress, it wasn’t much to write home about. It wasn’t enough! I need more power, Captain!
I began to be concerned this was a totally flawed plan and the internet wasn’t being truthful about this glow business. These spookily glowing green cupcakes were not looking possible at all. Then came time. Time for go big or go home! Time to get me a 24” blacklight tube bulb. After waving it around my kitchen like a jedi I turned my attention to the desserts. It glows! Mostly!
The tonic water, awesome! So blue! The white frosting, it was trying its best. Wherever there were peaks and valleys there were pink and purple highlights. Was it really glowing or just reflecting? I don’t know. But it looked pretty cool. I also had a bowl of piping gel. No. No glowy. And a bowl of runny frosting made of milk and powdered sugar… surprisingly glowy! I decided to add a little tonic water to the 3 types of frosting, thinking it would enhance the glowing power. It didn’t really do any noticeable difference, other than make them all too runny.
I was excited about the colored frostings, but they did nothing, even with super bulb. They didn’t even reflect light. I will admit I ran out of patience and just shoved those to the side.
In an effort to make a glowing treat I iced a cupcake with white frosting and a star tip to get good grooves and texture for the best glow. It looked nice. I think a whole cupcake stand would look cool. Next I grabbed the tonic water and flicked it all over the cupcake with a pastry brush. It gave it little speckles, along with my table. I tried a dipped one in gel/tonic water solution but all it got me was a wet cupcake, there was no super awesome green glow.
What is the moral of the story here? Yes, you can do it! You can have a glow party! Will it look like the ones online? Eh, maybe not. Depends on how far you want to modify your food for science. I still like to retain tastiness in my treats. I do think, over all, it would a fun trick to use for a glow party. Get yourself a tower of white cupcakes and splash some tonic water. And extra bonus: Add some tonic water to your beverage of choice, I just added a splash to my pink lemonade and ended up with a delightful concoction, I think I’ll make some for Halloween for the kids. Maybe it’s magic potion. Maybe it’s a strange scientific solution from a mad scientist’s lab!
For my little party set up I found a colorful fabric that loved the black light, added some pink umbrellas that took on a matching glow to the cupcakes. If it was my birthday, I think it would be a totally fun set up, and unexpected too. Also, I would get more blacklights for my party. From what I can tell the more bulbs the better, if you can up the wattage you’ll up the glow. Even without the desserts being beacons of light it was still a lot of fun eating and drinking shiny foods. I’m thinking with Halloween coming up I may need to stock up on some light bulbs.
Would I do a glow party? Yes! Would I rely on a 3 tiered birthday cake to glow? Maybe not. Not without more weird ingredients. Maybe the 4th time is the charm? There are a few more things I suppose I could try…
Amanda
Coborn’s Cake Decorator
Sartell, MN – Pine Cone Road
Click Here for more articles written by Amanda [...]
Read more...
August 25, 2016Healthy & Easy Back-to-School Snacks
When busy schedules take over this fall, try these timesaving, healthy snacks from Coborn’s Registered Dietitian, Ashley! They’re simple to make, taste delicious and will delight picky palates. Be sure to have the kids help make them for an enjoyable after-school activity.
Mini Fruit Pizzas
Top belVita Breakfast Biscuits with Nostimo 100-Calorie Vanilla Greek Yogurt and Full Circle Canned Fruit in 100% Juice.
Cucumber Sushi
Slice a cucumber into 1-1/2-inch-thick pieces and scoop out the inside with a melon baller. Fill with hummus and top with Food Club Shredded Cheese or shredded carrots.
Apple Cookies
Core and slice red and green apples horizontally. Top with Full Circle Creamy Almond or Peanut Butter, Bear Naked Fit Granola and Food Club Mini Dark or Regular Chocolate Chips.
Banana Boats
Slit a banana vertically down the middle. Lay sticky side up and spread Full Circle Creamy Almond or Peanut Butter over each side and top with sunflower seeds.
Ants on a Log
Slice celery into 4-inch pieces. Fill with Full Circle Creamy Almond or Peanut Butter and top with raisins.
Frozen Yogurt Bites
Mix Nostimo 100-Calorie Vanilla Greek Yogurt with blueberries. Fill an ice cube tray with the mixture and freeze for at least two hours.
Nutritious Nachos
Layer whole grain tortilla chips (no salt added) with guacamole, salsa, shredded cheese, canned black beans (drained) and shredded lettuce.
Apple Burritos
In a whole wheat tortilla, spread Full Circle Creamy Almond or Peanut Butter, layer with sliced bananas and then roll into a “burrito.” [...]
Read more...
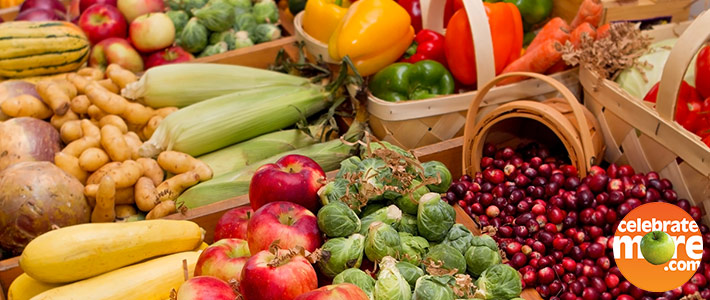
August 25, 201610 Best! Fresh Fall Produce
1) Apples
Apples are the sweetheart of fall. From apple pie to candy apples, this fruit can add tartness and sweet flavor to any meal. Perfect for Halloween, visit our recipe for Homemade Caramel Apples.
2) Brussels Sprouts
If there’s any vegetable that deserves praise, it’s this gem of the cruciferous family. Tasty and versatile, they pack a punch and really shine this time of year. Roast halved Brussels sprouts, quartered small onions and halved carrots at 375°F for 30 minutes then toss with just-cooked pasta, a splash of balsamic vinegar and crumbled feta cheese.
3) Zucchini
A member of the squash family, zucchinis peak in late summer, but they are still abundant in the fall for flavorful breads, side dishes and salads. Make Zucchini Cakes for a delicious breakfast.
4) Pumpkin
It’s pumpkin-flavored everything come fall – get these in our Produce Department for more than just jack-o’-lanterns. Toss pumpkin seeds with light butter and salt, layer on a baking sheet and bake at 300°F for about 45 minutes or until golden brown for a delicious fall snack.
5) Mushrooms
In the fall, mushroom varieties such as chanterelles and oysters are harvested. These woodsy-flavored vegetables are great in soups, stir-frys and more. For a more unique application – add them to meatballs! Try our Mushroom Meatball recipe.
6) Cauliflower
This broccoli-cousin is in its heyday right now. Cauliflower is extremely versatile… oven-roast, serve with a cheese sauce or use it to make a low carb alternative to mashed potatoes. Steam one head of cauliflower until tender, drain and discard excess water, add 3 tablespoons milk, 1 tablespoon butter, 2 tablespoons sour cream, salt and pepper, and then mash. You can even make a cauliflower pizza crust, especially for those who have celiac disease.
7) Radishes
Mostly eaten raw in crunchy salads, radishes are tasty root vegetables that can add color and a sweet flavor to many meals. During fall, try pickling them! Pack radish rounds into a pint-sized canning jar, prepare a brine recipe, pour it over the radishes, and then cover and refrigerate.
8) Sweet Potatoes
This starchy, tuberous root vegetable is a fall staple. They’re typically served roasted with sweet complementary ingredients like honey, butter and pecans. To make a simple baked sweet potato, prick the potato 2 to 3 times with a fork and then place it directly on the oven rack in the middle of the oven. Without preheating, cook at 425°F for 45 minutes.
9) Winter Squash
The arrival of crisp fall weather means it’s harvest time for colorful and tasty winter squash. Some of the most popular and versatile varieties of squash include acorn, butternut, delicata, golden nugget and spaghetti. Try our recipe for Couscous with Butternut Squash & Pine Nuts.
10) Cranberries
A fruit that is coveted for its natural antioxidants and super sweet berry flavor, millions of pounds of cranberries are harvested every fall. Put them in pies and other baked goods, make cranberry jelly, or use them to make a relish! Mix 4 cups of cranberries and 1/2 cup of sugar in a food processor, then toss with 2/3 cup each of diced celery, apple and chopped parsley for a relish like no other! [...]
Read more...
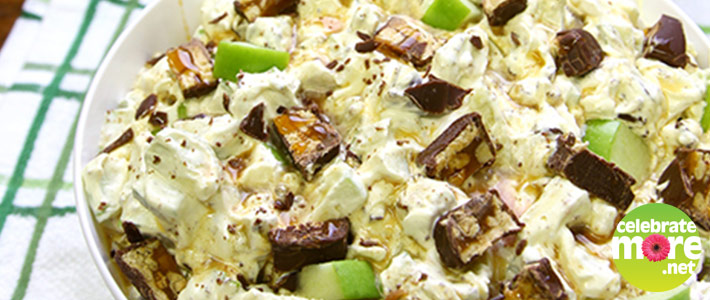
August 16, 2016It’s nearly back-to-school time and that means the swift transition into fall weather, fall clothes and of course – fall foods! We are celebrating a fall favorite of ours a few weeks before the leaves begin to change colors just because these recipes are so tasty!
This lovely bright green smoothie is super nutritious thanks to the Granny Smith apple and kale. It’s also super sweet tasting without any refined sugar. Tastes good and it’s good for you? Now that’s a win-win! And, did we mention it is the perfect recipe for your mid-morning snack or post-workout treat! Throw a banana in the freezer the night before for a dreamy cool breakfast treat.
Granny Smith Kale Smoothie
Ingredients
¾ Cup Unsweetened Almond Milk
1 Granny Smith Apple, cored and quartered (unpeeled)
2 Large Kale Leaves, stems removed
1 Frozen Banana
3-4 Shakes of Cinnamon
Garnish with Fresh Pomegranate Seeds
Instructions
In a powerful blender combine almond milk, banana, apple, kale, and a few shakes of cinnamon.
Blend at high speed until super smooth.
Pour into glasses and garnish with pomegranate seeds.
3.4.3177
Okay, so this one may not be quite as healthy as the last Kale Smoothie recipe… But it’s all about moderation and everyone needs a little dessert in their life! Here is our own personal version of the Granny Smith Snicker Salad. Try it out for your fall get-togethers and enjoy the slight crunch from the juicy Granny Smith Apples!
Granny Smith Snicker Salad
Ingredients
6 Snickers Candy Bars
4 Granny Smith Apples
16 Oz. Cool Whip Tub
½ Cup Milk
1 Packet Instant Pudding Mix
Caramel Topping
Instructions
Add ½ cup milk, instant pudding mix and cool whip together in bowl then whisk until powder is combined.
Core and dice apples into bite size pieces.
Chop Snickers to the same size as apples pieces.
Add apples and Snicker chunks to pudding mixture.
Refrigerate for at least 1 hour.
Drizzle caramel topping and sprinkle remaining Snicker on top before serving.
3.4.3177
This applesauce is made from whole Gala apples- skins and all! The skins add a nice texture and pretty deep amber color. Its flavor is inspired by the warm and creamy Chia drink and we think it will be perfect once the weather starts to cool off this fall.
Chia Spiced Gala Apple Sauce with Crème Fraiche
Ingredients
1 Cup Apple Juice or Apple Cider
2 T. Maple Syrup
1 tsp. Cinnamon
1/2 tsp. Ginger
1/8 tsp. Cardamom
1/8 tsp. Cloves
Crème Fraiche, for garnish
Instructions
Place the quartered apples and 1 cup of apple juice to in a pot and simmer for 30 minutes with the lid on until the apple are soft and juicy.
Frequently stir the apples to make sure they aren’t burning or sticking the bottom of the pan.
Add the spices and continue to simmer the apples 30 more minutes until they are very soft.
Puree in the pot with an immersion blender or in a food processor.
Serve warm and garnish with a swirl of crème fraiche, maple syrup, and cinnamon.
3.4.3177
We hope the rest of your summer is sensational and your transition into fall is a breeze! Enjoy these Apple-inspired recipes and happy baking, dessert making and smoothie-sipping! [...]
Read more...
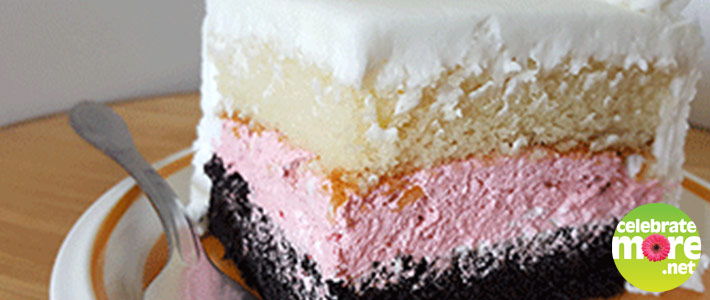
July 28, 2016It’s what on the inside that counts. As much as everyone loves an expertly decorated cake at the end of the day you know what everyone is looking forward to. Eating it! The most popular cake flavor I send out around here is marble. It’s a very Minnesotan choice. A little white cake, a little chocolate cake, everyone gets a little of what they want. Why not surprise your guests with something just a little different? The best way to jazz up your cake, whether it’s white, marble, chocolate, or beyond, is to add a filling. If one flavor is good, why not boost it with two? Here are some fun pairings to tempt your taste buds.
Strawberry Cream Cake, white cake filled with stripes of two of our most popular fillings. After splitting the cake it’s filled with diagonal stripes of alternating strawberry and bavarian cream filling. When you cut your cake you get a fun visual effect with the two fillings and with each bite your flavor changes a little. I like this cake with either frosting. Whipped tends to make it easier to taste the filling since it doesn’t over shadow with sweetness, but on the other hand, buttercream has that sweetness some people love in their cake. This cake can add a formal touch to an anniversary cake but also be a kid pleaser with its classic flavors.
If you are looking for something a little different try a lemon cake with raspberry filling, or as I call it in my head, Raspberry Lemonade. This cake has an unexpected zingyness when most people expect sweetness. The cheery lemon cake goes nice with raspberry filling to create a cake that makes me think of summer. I would say this cake definitely feels more grown up with its flavor combo. Another variation that I really enjoy is Strawberry Lemonade. The zingy lemon, the smooth sweetness of strawberry people most often say it’s “refreshing” in a world full of decadent chocolates, caramels, and cream cheeses.
Cookie and Cream Cake, chocolate cake filled with chopped Oreos mixed with whipped icing. Who doesn’t love cookies? The cookies add a nice texture contrast, but still soften up enough to make it easy to cut the cake. Either whipped icing or buttercream icing would go nicely. The whipped icing would keep the cake light and fluffy while the buttercream would mimic the cookie filling’s sweetness. This cake would also taste great with red velvet cake in place of the chocolate. I think it would be fun to do a cake for a little one who loves construction and add in this filling as “dirt”.
Strawberry Fudge cake, made with our pink strawberry cake and filled with gooey fudge filling. This cake makes me think of spring and little girl princess parties. The strawberry is sweet, but not sugary sweet. The fudge has a smooth texture and darker flavor in contrast to the strawberry. I like this cake with whipped icing. It kind of reminds me of a hot fudge sundae with strawberries on top. The whipped icing is like the mellow ice cream flavor. You could certainly use buttercream on this, it will just be a sweeter tasting cake and can make it harder to taste the mellow strawberry flavor.
In keeping with the strawberry flavor let’s make a Neapolitan Layer Cake! Coborn’s does offer this flavor as a cake on its own, it’s white with chocolate and strawberry marbled in to it. But how amazing does this neapolitan layer cake slice look? With a layer of chocolate cake, a layer of whipped strawberry filling and a layer of white cake this cake always impresses when the first slice is removed. Other than being lovely to look at it tastes great too. 3 classic flavors in one cake. You can eat one flavor at a time or load up your fork in mix and match bites. With either frosting this cake is a welcome treat at any get together. For a variation you could also try this cake with whipped raspberry filling instead, the tart filling will still look amazing and give a peppier flavor.
Are you hungry yet? I know I am. Maybe you’ll have to throw a party just so you can eat cake! White, marble, and chocolate cakes are great, but remember to treat yourself and your guests with something a little unexpected your next get together. Ask your decorator about cake and filling options next time you are ordering.
Amanda
Coborn’s Cake Decorator
Sartell, MN – Pine Cone Road
Click Here for more articles written by Amanda [...]
Read more...

June 21, 2016Summer is officially here and the perfect time for picnics – picnics in the park, picnics at the lake, picnics, picnics, picnics! When we think of preparing for a picnic, what is the essential item that every picnic needs? That’s right – a cooler! I’m here today to provide you with some tips to keep your picnic food safe utilizing your cooler.
Keeping in mind the 4 core food safety principles of COOK, CHILL, CLEAN and SEPARATE, all can apply in regards to your cooler with the exception of COOK.…..coolers do not make good cooking vessels – unless there is some new trend I haven’t heard about!
First off let’s look at CLEAN
Ensuring that the cooler is clean is the best first step, especially if you are using it to hold ice for beverages. If the cooler will be used as an “ice bucket”, you will want to completely wash the inside of the cooler with hot soapy water and rinse thoroughly prior to filling with ice for consumption. *The only reason I bring this up is because I have seen this happen and it is important for everyone to remember that ice is also a food. Coolers used for this purpose must be cleaned the same as washing an eating utensil and used ONLY for ice. If storing beverages and/or food products on ice, you do not want to consume this ice. The better option is to buy packaged ice and keep the package securely closed in between uses.
Secondly, let’s talk about SEPARATE
If transporting raw meat items in the cooler, it is best that you use two separate coolers to eliminate the risk of cross contamination between raw and ready-to-eat foods. Also, it is often best to keep beverages in their own separate cooler as well. On a hot summer day, the beverage cooler is typically the “go-to cooler” many times throughout the day. Frequent openings of the cooler can cause the contents to warm up quickly. Beverages are typically items that do not need to be kept cold for food safety reasons with the exception of dairy products; therefore, a beverage such as milk should be kept in the “food” cooler.
Lastly, the CHILL
Potentially hazardous foods or those that need temperature control for safety – meats, dairy products, cut fruits and veggies all need to be kept at 41 F or below. This is sometimes difficult to do with a cooler, especially for an extended period of time. Placing these food items in tightly sealed plastic bags and then surrounding them with ice will certainly help keep them cold. Ice packs and frozen foods can also be used. Make sure you are using an insulated cooler and save the packing of the food cooler until last – straight from the refrigerator into the cooler into the car. At the picnic site, keep the coolers out of direct sunlight and replenish the ice when needed.
I hope you will find these cooler tips helpful and you keep them in mind as we step full swing into summer, which means… Great opportunities for picnics!
Kim
Coborn’s, Inc, Food Safety & Nutrition Manager, Registered Dietitian
Click Here for more articles written by Kim
[...]
Read more...

May 31, 2016Welcome to grilling season! Actually, with the mild winter we had, my assumption would be that for many of us our grill never got fully put away or maybe it has been out several times already! Nevertheless, I am here today to talk about safe grilling and offer some tips to keep foodborne illness off the plate. Let’s start with the grill…
The Grill. The star of the show. On second thought, is it really?? I would venture to say, and you would too, that the food is the star of the show or should be anyway. To keep the food the star – always start with a clean grill and follow the tips included below.
When grilling, marinating is always a nice touch. It adds flavor to the food and can aid in tenderizing as well, making for a pretty darn good steak. Marinating should always take place in the refrigerator – not on the counter. Remember that Danger Zone we’ve talked about in the past (41F – 140F). If you want to use some of the marinade as a dip or basting sauce later, set aside a portion before adding raw meat, fish or poultry to it. Never re-use the marinade from raw meat, fish or poultry unless you boil it first. For best flavor and ultimate safety, it is best to just save a portion of the marinade.
Once the marinating is complete, it is time to get out to the grill and fill the neighborhood with wonderful aromas! Keep in mind the utensils and that plate used to carry the meat out to the grill should not be used for the cooked foods. These items should we washed in hot soapy water followed by a clean water rinse prior to using again. As the item(s) are cooking, gather a clean serving plate, tongs and your best kitchen tool yet – that’s right – the food thermometer! A food thermometer should always be used to check for safety and doneness as it is the most reliable method. Meat and poultry cooked on a grill often brown quickly and may appear done on the outside, but still may not have reached a safe minimum internal temperature to kill harmful bacteria. Use the temperature chart below as your guide. Did you know – one out of four burgers turns brown before it reaches a safe internal temperature?
Fish 145 °F
Steaks, roasts and chops 145 °F
Hamburgers (ground beef/pork) 160 °F.
All poultry 165 °F
Fully cooked meats (hot dogs, ham) 165 °F or until steaming hot
Serve hot, grilled foods immediately to keep them the star of the show. Again, it is very important to put cooked foods on clean plates that were not used to hold the raw meat or poultry using clean utensils. (This cross-contamination is a prime cause of summer foodborne illness.) Also another key factor in foodborne illness is the holding temperature. Perishable foods should be consumed within two hours, one hour in warm weather (90°F +). Discard if these limits are exceeded.
After enjoying your delicious grilled creations, it’s back to the grill for some clean up. If it is not the star, it should at least shine for it’s award as best supporting role! Follow the manufacturer’s instructions for best cleaning results and keep a watchful eye out for any bristles that may have come loose from the cleaning brush. You do not want to end up with these as a surprise in your next meal!
Enjoy making your food the star of the show! I wish you SAFE and Healthy grilling!
Kim
Coborn’s, Inc, Food Safety & Nutrition Manager, Registered Dietitian [...]
Read more...

May 19, 2016Celebrate someone or embarrass someone. We have that power. With our photo printing system we can add a special touch to anyone’s cake. I’ve added pictures of adorable babies and toothless elementary students from the 1950’s to cakes. Vintage wedding photos look amazing when bordered with roses on an anniversary cake. Have a picture of your best friend from the 80’s in their acid washed jeans and crimped hair? Let’s put it on their cake!
I’d like to give you some tips on the do and don’ts of getting one of these fun cakes.
First, how does work? Well, the most important thing you should know is we won’t be harming your photo. It’s all digital as far as resizing and making things edible. All your decorator needs is either a physical print of the photo you want or a digital copy. Our machines have CD drives, USB ports and slots for memory cards.
Things to know about choosing digital photo files for your cake. Our machine only recognizes jpg format. So, if you spend time making your own fun photo collage with borders and writing, please remember to save it as a jpg so our machine can read it. There are ways we could force it to work, but remember, not all of us decorators are technology wizards. We are frosting wizards! You can also make this process a little smoother by bringing in only the photo files you’d like us to use. My machine won’t keep the photos neatly organized into folders like you see on your computer. I’ll have to look through thumbnails of all 227 photo of your family vacation to find that one funny picture of your mom hulu dancing. If you can’t make it into the store or your picture is hanging out on your cellphone you can also ask your bakery for their email address and send the photo to them via email attachment. This is a great option for phone orders.
If you have a paper photo you would like used we have a scanner on our photo machines. Sometimes people bring me in items for scanning that have been folded in half, they have scratches or discoloration. I don’t have a photo program to fix these flaws. The scanner will pick these up and you will see them in the print. I can’t adjust color or do any touchups to old photos as much as I’d like to do minor adjustments. Also, I wouldn’t recommend printing off the photo at home on computer paper and bringing that in. These typically end up with small lines running through them, a quality issue on the cake. If the photo is on your computer it would be best to get us the digital copy to use, the final print on the cake will look much better. Remember, we are printing on edible paper with edible ink and then letting the image melt into the frosting. The better the starter image the better the final result. Long story short, when we scan your photo, the scan is as good as the image we start with.
Once we have your photo on our screen we can resize, crop the photo, add words, or frame it with a variety of digital options. After we’ve gotten the picture to our liking we just hit the print button. We can print on sheets of paper approximately the size of traditional computer paper. I also use sheets with 3 inch circles or 2 inch circle from time to time. These are great for decorating cookies or even cupcakes.
After the printer rolls out my edible image it’s time to get the scissors and trim it up. From here we apply the photo to fresh frosting. After a few hours the image will meld into the frosting becoming less paper like and more like a screen printed image that is part of the cake. From here we can decorate, decorate, decorate! If you see a design in your bakery, let’s say a graduation cake, that doesn’t have a picture, the decorator can usually rework the design to fit in your picture. So, if you have a picture you really want to use, bring it into the store. We can work it in to existing designs or even better, design a whole cake around your unique photo.
One last thing I should mention is the main limitation of our photo printing. While we love making your photos in to cake decorations or using one of our hundreds of photo cake character designs, we can’t go too nuts as far as making copies go. We aren’t allowed to scan your invites or paper plates with your favorite character on it, just like we can’t grab images from online or free hand draw or sculpt them. I know sometimes the little ones get their heart set on a very specific image for their birthday cake, but copy write laws just don’t allow for us to do some things. But our creative cake designers would love to talk about the many, many, other options we can provide for cake happiness.
Amanda
Coborn’s Cake Decorator
Sartell, MN – Pine Cone Road
Click Here for more articles written by Amanda [...]
Read more...
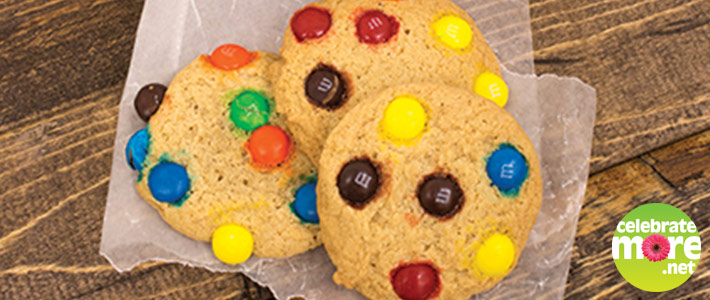
May 17, 2016Since the Coborn’s Gluten Free Bakery launched this past August 2015, dozens of new, delicious and fresh products have been released from the facility located in the heart of Minnesota. This St. Cloud facility is in a completely separate bakery from Coborn’s conventional bakery to ensure zero cross contamination with gluten containing ingredients. This spring the Gluten Free Bakery staff has been hard at it again, and this time they have a new mouthwatering cookie to show for their efforts.
Brand new to the Gluten Free Bakery scene are Coborn’s first ever Gluten Free M&M Cookies. Not only are these cookies entirely Gluten Free to ensure safety of guests, they also feature hand dipped M&M’s and are made fresh to ensure guests are purchasing the best tasting cookies possible. Want to know the best part? After being tested by multiple M&M Cookie fanatics, there is virtually no taste difference between these Gluten Free M&M Cookies and the traditional Gluten Containing M&M Cookies from the Coborn’s Bakery.
After research and feedback from guests, Coborn’s realized the growing need for a Gluten Free facility in the central Minnesota area that offers products that are fresh, and not frozen like the majority of Gluten Free products on the market. Once Coborn’s realized the great need in the area for Gluten Free Bakery goods, they went hard to work crafting the products that tens of thousands of Midwestern families now know, love and purchase on a consistent basis. Ensuring the products taste good is just half the battle for the Coborn’s Gluten Free Bakery, because in addition to fresh and great tasting products, they also want to ensure the safety of their guests. Coborn’s recognizes the detrimental effects that even the slightest level of gluten can be for guests. For that reason they are taking additional safety precautions to ensure that the Gluten Free title holds true for each and every product that leaves the bakery facility and ships to all Coborn’s locations throughout the midwest each and every morning.
Not Gluten Intolerant, but still want to try the great products? Choose from decadent sugared cake, donuts or muffins in a variety of flavors, hamburger and hotdog buns to accompany grilling season favorites, and delightful bars, cupcakes and cookies for all occasions. The Coborn’s Gluten Free Bakery section has something to delight all taste buds – whether you have a Gluten Intolerance or not. As the kickoff to summer takes place there are multiple picnics, graduation parties and other family or friend get togethers that you are sure to be attending. Before heading out for your weekend getaway pick up a package of our brand new and delicious Gluten Free M&M Cookies. Not only are they safe for Gluten Intolerant guests, but they are also truly delicious! [...]
Read more...

May 16, 2016Build Your Best Burger
The burger has never lost its appeal for millions of its admirers. An ideal feature of the beloved sandwich is that it can be served simply, or be all decked out with the items of your choosing. There’s no limit to the number of combinations for a better burger.
Stuffing:
You’ve heard of stuffed pizza. Well, how about stuffed burgers? Stuff the center of an uncooked patty with blue cheese, sautéed mushrooms, shredded veggies or zesty
salsa – or simply grab one of our Coborn’s Four Brothers Gourmet Beef Patties from our Meat Department.
Be Gentle:
Don’t be tempted to smash your spatula down on the beautiful burgers. You’ll lose the natural juices. Instead, use a fork to poke holes in uncooked patties. Heat will work its way through and cook the meat evenly.
Cheese, Please:
Just before your burgers are done, top with your favorite gourmet cheese. Be adventurous and try a cheese you’ve never had before. Here are a few delicious suggestions:
Blue Cheese – Tangy, buttery and sharp, blue cheese melts beautifully.
Mozzarella – Soft and delicately flavored, perfect for melting.
Sharp Cheddar – Creamy with just the right balance of flavor and sharpness.
Swiss Cheese – Nut-like flavor, smooth, delicious and easy to slice.
Add Some Extras:
Go with familiar sautéed onions and mushrooms, or try sautéed red onions, sundried tomatoes, pepperoni, sliced avocado, grilled jalapeño peppers or Canadian bacon.
Switch Up the Condiments:
In place of tried-and-true mustard, ketchup and/or mayo, try using steak sauce, horseradish or pizza sauce. Guacamole is another alternative and provides a “good-fat” option. Your burger can be taken up a notch by topping with a garlic-herb butter. And for those who really want to try something new… attempt to make a homemade ketchup with fruit other than tomatoes, like bananas, cherries or figs.
The Bun:
If you’re extensively dressing your burger, you may want to choose a sturdier bun. Other than that, the sky’s the limit with the number of choices. Try ciabatta, brioche or pretzel varieties, available at your local Coborn’s Bakery. [...]
Read more...

April 14, 2016You’ve spent the last hour decorating your perfect cake. The theme is expertly reflected. Maybe it’s robot dinosaurs. Perhaps it’s a sophisticated retirement cake with a hand painted lake scene. Now for the inscription. What are you going to do? Use your normal cursive? Yeah. That’s alright. It’s nice and it’s readable. But what if you continued your theme into the words? What if you made your inscription part of the decorations versus something you snuck in at the end?
I’d like to show you a few handwriting styles I use during the week. It’s an extra little touch to give your cake that professional polish. I think of them in my head as my cake fonts. I’ve got a pretty good collection of styles I’ve picked up, but let’s just talk about 5 of my favorites. I’m going to skip super ornate cursive, it seems most people have that covered and doing girly stuff seems to come naturally to most decorators.
Scribble
Once you’ve gotten comfortable with your cursive cake writing you can begin playing around with embellishment. For this type of writing I write fairly normally with less emphasis on keeping all the letters uniform. I like to start at the far left of my cake and start a little “scribble” line, little loops and curves, leading up to where I want my message to start. At this point you go from scribble line to writing the words. You can link multiple words together, but make sure to leave a defined space with a gentle looping line in between them to make sure your message is still readable. When you finish your last word have the letter trail off into another scribble line that goes to the far right of your cake.
I like using this style for fun party cakes. It’s good for boys and girls and even adults. How cool would it look to have fun scribble lines in rainbow colors across the cake with some of the scribbles being the message? Or, what if you drew a little sewing needle around one end of the words to make it look like embroidery thread for a sewing themed cake? Ooo! It was also look fun as dental floss on a cake for someone in the dental business!
Print Plus
Sometimes your cake needs print for writing instead of cursive. Maybe it’s for a young child and you want them to be able to read it. Maybe you want a more masculine look. Loopy pretty handwriting is my go to style, but it doesn’t always look right. Sometimes the theme of the cake is just asking for print. And if you can do print, why not do “print plus”? It’s a little extra touch to give your writing a little more style.
Start with printing out your message. Leave yourself some space, if your letters are too crammed together or the letters themselves are written too compact you won’t have a lot of space for the next step. Once you’ve written out your words come back and thicken parts of each letter. I use all the vertical areas on the letters. And if there are multiple vertical spots, like a “s” or an “o” I use the left most side. You could do all the vertical areas too if you want, but if the letters are already small you may lose the thin parts of your letters and just end up with just bubble letters.
Connect the Dots
This one is similar to Print Plus, but it’s less formal and more youthful. I like to write out my full message, sometimes with a more jumbled appearance versus neat and orderly. Once you’ve printed your letters you can go back and add little dots to the ends of all the straight lines. It should look like you played connect the dots when you wrote out the words.
This is a fun one for baby showers or toddler birthdays. You could turn a few of the dots in to little daisies for a bubble daisy themed cake or hearts on Valentine’s Day. I also like to use it on frog themed cakes, I don’t know why, but the jumbled nature of it and the little dots remind of floppy frog legs jumping all over.
Creepy
Why wouldn’t you want to finish off your Halloween cake or over the hill cake with perfect themed writing? For this style I use a size 2 round. If you use too big of a tip you don’t get that nice fine line and the end of your letters. Now, you’ll want to think of each letter of the alphabet as a series of lines. So, an “H” is pretty easy, as is a “L”. But what about that “S” or B”? On curved letters I try to break them into little half circle shapes. It’s ok if your “O” doesn’t have a perfect rounded bottom. The goal is to make your letters look like they are made of drips or that some creature was scratching them into your cake with long claws.
To pipe the letters you start at the highest point and apply more pressure than normal. You want the top portion of your line to be thick. Then, as you draw the line down or to the side you let up on the squeezing pressure to let the line taper off as you move. The more contrast you can create between the thick and thin areas the better your writing will look. Don’t be afraid to have your letters be a little uneven, let some of them trail off longer than others. The irregular look will add to the creepiness.
Seeing Double
For our last writing style let’s get a little more colorful. Let’s talk about writing in double color. I like using this method on cakes with very busy backgrounds to help set off the writing. Or sometimes it’s helpful on a monotone cake to help set off the similarly colored writing. And there are always kids who ask for “pink and purple happy birthday!”. And hey, it also just looks cool, so why not?
You’ll need 2 round tips, one larger than the other. So, if I’m going to write with a size 2 I’d use a size 4 for the shadow background. Or a size 3 with a size 5 shadow. You get the idea.
Start with the larger of the two rounds. Write out your message. You want the letters to be a little bulky. Now, either let the frosting sit a few minutes to firm up or use a little powdered sugar on your finger or flower nail. Tap down the letters, make them nice and flat. At this point it’s probably going to be hard to read the words, that’s ok, that’s actually good. Now take your smallest round tip and rewrite your message of the top of the flatten words. And there, you’ve done it, double color writing! I see people do this style and they tend to either skip the flattening, which isn’t a big deal, or they use tips that are the same size, which is a bigger deal. If you tips are the same size you can’t really see the under color. Your words get tall and sometimes they fall off the “track” and look sloppy. It kind of looks like your changed mind on color, everything you do on your cake should look like it was done on purpose.
The most important thing you can do is play and practice. Pick up a pencil and just doodle and experiment. Let your hand get use to the motions. Once you’ve built up a little muscle memory you’ll find it much easier to do your fancy writing with a bag of frosting. Try mixing styles and play with colors. Brush up on your writing skills and everyone will be impressed by how you thought out the cake from beginning to end! Happy decorating!
Amanda
Coborn’s Cake Decorator
Sartell, MN – Pine Cone Road
Click Here for more articles written by Amanda
[...]
Read more...

March 24, 2016What’s that I hear? The ringing in the distance. It’s wedding bells! As spring emerges it’s the time of the year when decorators start thinking about weddings. While June is a classic month to say “I do” we will be kept busy all the way through October designing and building wedding cakes. Not surprising we see plenty of Pinterest pages at work, everything from wedding cakes to first birthday cakes.
For a little change of pace from my usual how-to projects I thought we could look at the 5 styles I have been asked about the most. There is a little something for everyone in the mix. The fun part of cake decorating is in how styles are forever changing and renewing. Gone are the days where you can only pick out “wedding cake #26”, it’s all about personalization and creative conversations. Check out this list of everything from soft, feminine, cakes to bold and strong statement cakes.
Ruffles and Rosettes
Texture, texture, texture. Whether it is in swirls of frosting rosettes or layers of ruffles this look is so versatile and fun. It’s great for white on white cakes or with ombre fading. You can keep it casual for an outdoor summer reception or dress it up for a more formal tuxedo wedding.
While you usually see the ruffle technique done in fondant when browsing magazines or searching online it also works well when translated to buttercream. Feel free to play around with the textures and do a little mixing and matching. This style of cake has also been quite popular for birthdays, graduations, and baby showers. With just a little color change these cakes will impress guests at any event.
Rustic
Simple, natural, earthy. There is nothing like a buttercream cake with lots of frosting in soft waves to make you want to dig in with a fork before the dinner service starts. These simple cakes are perfect for dressing up or down as they are basically a blank canvas.
They go nicely with a bundle of flowers or a special cake topper. Normally with a more detailed cake you wouldn’t want to hide it with accessories, but with this rustic cake have fun and play with your table setting. Display it on a tree stump on a bed of moss. Try it with fairy lights and lanterns on the table for a whimsical look. It can also look at home in a garden setting with lots of fresh flowers and greenery.
Chalkboard
This fun trend is the perfect opportunity to personalize you cake. These cakes have at least one tier covered in black fondant that can then be painted with white food coloring. Use your initials, special dates, little doodles, favorite quotes, to make a cake that is unique to you.
If a 3 tiered cake covered in black seems too dark for you try one tier in black and the other tiers done in your wedding colors. Or break up the all black cake with an abundance of fresh or sugar flowers. The colors of the flowers will really stand out against the dark background.
Painted
For a sleek, modern, look there is always a painted cake. These cakes are typically covered in fondant and decorated with nothing more than a paint brush and food coloring. You’ll want to keep the accessories to a minimum and have a simple table to keep the hand painted art work be the focus. These cakes can be painted with flowers, portraits, words, landscapes, or be inspired by a favorite piece of art. A good painted cake will leave you torn between chowing down or hanging it on your wall.
Metallic
When you want glitz, when you want shine, you want metallic. Most people have been turning to gold for the metallic look. Paired with soft colors you can achieve a gilded antique look. When done with white your cake will look fit for a princess. Be daring and choose a black or navy cake with glowing golden accents for a rich and modern cake.
Achieving the shine can be done with gold leaf, the more expensive option, or with dusting powder that is liquefied and painted on. Another option would to use golden airbrush color, but the end product isn’t as strongly shiny as the photos that can be found online. One thing to consider when choosing a metallic cake is “how will this cake be displayed?” Most receptions feature candles and soft lighting. To really show off your glitzy cake you’ll want to make sure there is a light source for you cake. Without a little spot light or sunlight your metallic cake’s luster can’t be fully appreciated.
Did you find something that piqued your interest? Were we close, but not quite? Don’t be shy, set up an appointment for a consultation with a Coborn’s decorator and get your brain storm started with the professionals. Bring anything that inspires you, including color samples, invites, or jewelry. Building your dream cake is half the fun. What’s the other half? Eating it, of course!
Amanda
Coborn’s Cake Decorator
Sartell, MN – Pine Cone Road
Click Here for more articles written by Amanda [...]
Read more...
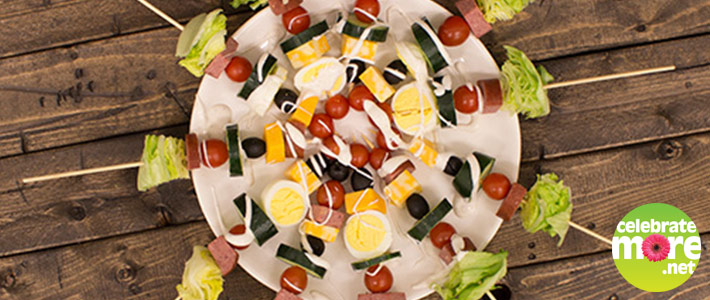
February 18, 2016If you know me well you know I am a creative and artistic person… When deciding on a blog topic I thought, “Why not let that creativity shine through with the foods I create?” This food art is titled; “Salad On A Stick” and I just love how great they turned out! My coworkers would agree, as they were completely gone shortly after setting them out to eat at the office.
The first secret to a really great Salad On A Stick is to have foods with lots of color and great variety for guests to pick and choose from. The second secret is to have salad dressings that everyone will love! Wishbone has my favorite dressings and their great flavor can really spruce up a salad! I picked all of my favorites to set out when I made these for my coworkers to try. My favorite flavors are Italian, Western, Ranch and of course I had to include the Raspberry Walnut Vinaigrette. If you want to take your salad from okay to outstanding then pick up these delicious dressings from Wishbone to try. Believe me when I say your guests will thank you.
These appetizers are as easy to make as 1, 2, 3.
First pick up your fixins’, dressings and kabob sticks. I purchased blocks of cheese, a variety of meat, hard-boiled eggs, cucumbers, olives, tomatoes and a head of lettuce to break up.
Then cut up your food into cubes or bite size pieces. This will make them easier to eat and less messy for your guests.
Finally prepare them in an eye appealing fashion on the kabob stick. If you’re looking for a more do-it-yourself concept you could make a kabob bar! Simply set the sticks at the beginning of the line, the cubed food in the middle and the Wishbone dressing at the end. Guests will marvel at your creativity and appreciate the opportunity to add their favorite items to their Salad On A Stick.
Salads On A Stick are great for a multitude of events. From barbeques, graduation parties, picnics, potlucks, dinner on the patio, or even as a side for a Bloody Mary bar they are the perfect appetizers and I promise everyone will love them and you’ll love how quick and easy they are to prep for.
The next time snow is in the forecast or the winter weather is getting you down, just remember this blog and be optimistic that soon spring and summer will be here and you’ll have a delicious appetizer to bring to all of your warm weather events!
I hope this crafty creation can bring some inspiration to your life! Be sure to check out the rest of my blog with the link below!
Lynell
Coborn’s, Inc. Graphic Designer [...]
Read more...

February 11, 2016Hi Everyone! My topic for today’s blog is the “5 Second Rule”. I think at some point in time we all have either given into the 5 second rule and/or at least contemplated it, right? I, myself, can say that is true. Saying to myself… “Really, what could possibly be wrong with this, it was only on the floor for a second?!?!” Well, let me tell you, there are various organisms including some fairly harmful bacteria that reside in the soil: Listeria, Salmonella, E.coli… just to name a few. Granted, not all bacteria residing in the soil are harmful, but the reality is we do not know where these harmful ones are lurking. They don’t glow, smell or leave any type of calling card that let you know where they are residing, so it is best to presume they may just be there!
Also, just thinking about all of the places our shoes take us each day, from either walking across the grass to pick up something blowing in the wind to walking through a park or down a trail where a dog needed to do it’s business or a bird flew overhead leaving nature’s duty in it’s path. This leaves the bottoms of our shoes a nice little harborage area for germs, in turn leaving some of these bugs behind on the floor as we walk through the cafeteria or into the restaurant or across our own floor at home. Some might say, “Well, I remove my shoes when I get home.” I think we all have experienced, though, even if we are committed to taking our shoes off in our homes, that our floors still get dirty. Either from dust, old food debris that may have fallen on the floor from previous meals and even dirt (because we cheat from time to time, don’t we? “I just need to run in quick and get my cell phone that I left on the counter!”) …your secret is safe with me.
If the potential for some harmful microorganisms lurking on the floor doesn’t raise a cause for just throwing the food out, what about the thought of any physical object sticking to the food item. A piece of hair, a small pebble or that little dust bunny. Biting into these physical objects makes eating not very pleasurable either.
So the next time someone shouts, “5 Second Rule!” Think twice… Do you want to take the risk? Or would you rather pick it up, throw it out, wash your hands (of course) and go for another bite of something that hasn’t spent even a second on the floor!
Wishing you healthy and SAFE eating!
Kim
Coborn’s, Inc, Food Safety & Nutrition Manager, Registered Dietitian
Click Here for more articles written by Kim
[...]
Read more...

February 1, 201610 Ways to use Coborn’s Rotisserie Chicken
1) Chicken and Vegetable Soup
Add shredded rotisserie chicken to your favorite can of vegetable soup. Garnish with shredded cheese and crushed tortilla chips. Or, make a simple homemade version, try our Chicken Enchilada Soup recipe here.
2) Chicken and Cheese Baked Potatoes
Bake Yukon gold potatoes at 450° for 50 minutes or until tender. Cut open and garnish with pieces of rotisserie chicken, a dollop of sour cream and chopped scallions.
3) Sandwich
For a quick and easy weeknight meal, use rotisserie chicken as the protein base of a healthy sandwich.
4) Southwest Chicken Salad
Combine shredded rotisserie chicken with salsa, avocado and cilantro to make a chicken salad with Mexican flavors. Serve over lettuce with tortilla chips for added crunch.
5) Spring Rolls
Click here for a recipe on how to make Easy Southwest Chicken Spring Rolls using rotisserie chicken.
6) Chicken Pasta with Lemon and Basil
Sauté chopped rotisserie chicken long enough to warm it through. Add in aromatics like chopped fresh basil and garlic; sauté until softened. Toss chicken and aromatics with cooked pasta. Garnish with Parmesan cheese and dress with a squeeze of fresh lemon juice.
7) Dips
Add shredded chicken to your favorite dip recipe for extra flavor and texture. Try our recipe for Buffalo Chicken Dip here.
8) Chicken Sloppy Joes
In a sauté pan, cook chopped onion, bell pepper and garlic on medium heat with a tablespoon of olive oil until soft. Add chopped chicken and cook until meat is warmed through. Stir in equal parts jarred marinara and barbeque sauce. Serve on a warm hamburger bun.
9) Chicken Tacos
Use shredded rotisserie chicken with your favorite homemade taco dinner fixings for a more nutritious version of traditional ground beef tacos.
10) Easy Salads
Add chicken to Coborn’s prepared salads from the Coborn’s Deli Department. Try it on top or mixed into the Southwest Taco Pasta Salad and Penne Pasta with Tomatoes.
[...]
Read more...

February 1, 2016Leftover Ham Innovations
We’ve got a few tasty ideas for those last remaining slices.
Ham & Egg Cups
Line the cups of a muffin tin with slices of leftover ham. Crack an egg on top of the ham; sprinkle with cheese. Bake at 400° for about 12 to 15 minutes. The egg white should be set and the yolks just slightly runny.
Ham Stir-fry
Make a stir-fry with leftover vegetables and ham. Toss with soy sauce and sesame oil. Serve on a bed of short-grain sticky rice or your favorite Asian noodle.
Ham, Macaroni & Cheese
Add chopped ham to your favorite boxed mac and cheese or homemade macaroni and cheese recipe. Toss in some peas for added color and flavor.
Ham Salad
Shred slices of ham with your fingers and add it to your salads. We suggest something sweet to complement the flavor of the ham, like roasted sweet potatoes, beets and goat cheese.
Grilled Cheese and Ham
Add some protein and flavor to your grilled cheese sandwich. Try rye bread and Swiss cheese as an alternative.
Country Ham Relish
Combine leftover ham and golden raisins in a food processor; pulse until no raisins remain whole. In a bowl, blend this mixture using a spatula with cream cheese, mayonnaise and pickle relish. Season with salt and pepper to taste. Serve as a dip or spread on a sandwich with a slice of tomato and lettuce.
[...]
Read more...

February 1, 2016Citrus Basics
Sweet and refreshing, citrus is a wonderful snack. Plus, it’s portable and comes in its own packaging. A great addition to many recipes, there are plenty of things you can make with the leftover peel as well. Here are a few suggestions.
Make Candied Peels
Candied peels can be used to garnish desserts or can be eaten as a snack on their own. They’re even more decadent when dipped in chocolate.
Citrus Salsa
Combine citrus peel, chopped citrus fruit (orange, grapefruit, tangerines), sliced scallions and chopped cilantro. Toss with lime juice and serve over grilled meat or fish.
Citrus Infused Liquor
Homemade flavored liquor is super easy to make. Simply steep citrus peels in your favorite liquor for a few days or up to two weeks. Strain out the used peel before serving. This method also works with olive oil and vinegar.
Tea Time
Citrus peel adds wonderful flavor to your favorite cup of tea. Prepare peels by scraping away the bitter white pith and arranging them in a single layer on a plate or drying rack. Allow them to dry out for several days. Keep stored in an airtight jar and away from sunlight.
Freezer Pops
Combine citrus juice (use one or a combination of a few), water and gelatin, pour into freezer pop molds and freeze until hard. Experiment with different flavor combinations.
Citrus for Dessert
It can be as simple as enjoying fresh orange slices with a few pieces of dark chocolate. Or, try something like a combination of sliced citrus with marmalade and vanilla served with yogurt, then topped with shredded coconut. [...]
Read more...

January 28, 2016This fall the Coborn’s Support Center moved to a brand new building. The building, my workspace and the entire campus are absolutely beautiful and it creates a wonderful atmosphere to work at, but unfortunately I have to drive a little farther for my daily commute. With busy mornings where you are trying to get up and go quickly, I needed something that makes planning out lunches a little bit easier.
I suppose the easiest lunchtime solution is to go out to eat, which I’ll admit is nice occasionally, but it can be pricey to do everyday and not always healthy for you. That’s why I’ve collected some delicious recipes to share with you all that I promise will spruce up any boring lunch routine!
Food Prep Freshness
Glass mason jars help to keep the salads very fresh, and by using wide mouth jars I have created delicious salads that are perfect for anyone on the go or looking for a healthy and fun way to get their greens in- no salad bowl necessary. My mason jars were even chalkboard jars I picked up from a craft store for added lunchtime creativity!
Everything on my Facebook homepage lately seems to feature food recipes, clean eating blogs and meal prepping ideas. What better way to follow suit than to make my complete week of salads on Sunday evening and have them ready to go for the entire week.
I love the taste, freshness and most of all the convenience of these Mason Jar Salads. Best of all you can make so many different varieties, which means lunchtime doesn’t need to be boring, it can be as original as each day of the week!
Check out some of the recipes for these Mason Jar Salads below:
Dietitian’s Choice Salad
Dietitian’s Choice Salad
Ingredients
2 T. Kraft Balsamic Vinaigrette
4-6 Baby Carrots, chopped
1/4 Cup Peas
1/4 Cup Peppers, chopped
1/4 Cup Garbonzo Beans
1/4 Cup Reduced Fat Feta Cheese
1/2 Cup Tomato, chopped
2 Cups Spring Mix Salad Greens with Kale
Instructions
Wash Jar.
In the same order that is listed above add your ingredients to a wide mouthed mason jar.
Shake jar when ready to be eaten and refrigerate if you are saving it for a later date.
Notes
Dietitian’s Notes:-This salad is great because the wide variety of vegetables are full of fiber, vitamins and minerals. -Add dried cranberries to your salad to represent as many food groups as possible, but make sure no sugar is added!-Make sure you always have beans or some sort of protein added to your meals, and if a salad is your full meal make extra sure they are added!-Olive Oil and Balsamic Vinegar add a great flavor and provide healthy fats.-Aside from the Feta Cheese (19) and the Balsamic Vinegar (18) all of these ingredients have a 100 on the NuVal Scoring System!
3.2.2265
BLT Avocado Salad
BLT Avocado Salad
Ingredients
2 T. Kraft Bleu Cheese
1/2 Cup Tomatoes, chopped
1 Avocado, chopped
6 Bacon Slices, cooked and chopped
2 Cups Lettuce or Spinach Mix
Instructions
Wash Mason Jar.
Add ingredients in the order listed above.
Keep refrigerated until ready to eat.
Shake jar, add chips and enjoy!
3.2.2265
Greek Salad
Greek Salad
Ingredients
2 T. Kraft Red Wine Vinaigrette Dressing
1/2 Cup Cucumber, chopped
1/2 Cup Tomatoes, chopped
2 T. Red Onion
4 Oz. Skinless Chicken Breast, cooked and chopped
2 T. Reduced Fat Crumbled Feta Cheese
1 T. Black Olives, chopped
2 Cups Romaine Lettuce, chopped
Instructions
Wash Mason Jar.
Layer jar with dressing, cucumbers, tomatoes and onions.
Add in chicken, feta cheese and olives.
Top with lettuce.
Refrigerate until ready to eat.
When ready to eat shake jar.
3.2.2265
Mom’s Salad
Mom’s Salad
Ingredients
2 T. Kraft Bleu Cheese Dressing
4-6 Baby Carrots, chopped
1/4 Cup Cauliflower, chopped
2 Oz. Bacon Real Bites
2 Cups Romaine Lettuce
Instructions
Wash Mason Jar.
Add ingredients in the order as listed above.
When ready to eat shake jar and enjoy.
Be sure to refrigerate if salad is going to be eaten at a later date.
3.2.2265
Taco Salad
Taco Salad
Ingredients
2 T. Kraft Classic Catalina Dressing
1 T. Salsa
2 T. Sour Cream
1/4 Cup Taco Meat
1/2 Cup Tomatoes, chopped
1/4 Cup Kidney Beans
1/8 Cup Shredded Cheddar Cheese
1/2 Cup Tortilla Chips, crushed
2 Lettuce, shredded
Instructions
Wash Jar.
Add ingredients in same order as listed above.
Refrigerate until ready to eat.
When ready to eat shake jar.
3.2.2265
Strawberry Poppyseed Salad
Strawberry Poppyseed Salad
Ingredients
2 T. Kraft Creamy Poppyseed Dressing
1/2 Cup Strawberries, sliced
1/4 Cup Blueberries
1/4 Cup Almonds
2 Cups Romaine and Spinach to Brim of Jar
Instructions
Wash Jar.
Wash produce.
Add ingredients in order to above and keep refrigerated.
When ready to eat shake jar and enjoy.
Notes
Additional optional topping:Mandrain Oranges
3.2.2265
Tips & Tricks
The number one most important rule to remember when making these salads is to always keep the dressing at the bottom and the salad greens at the top of the jar. Keep the two layers as far away from one another as possible by having them separated with your hard veggies, protein and soft veggies. If you do that, your greens will stay crispy and fresh with no problems.
Follow this Layer List:
Layer 1 (Bottom of Jar): 2-4 T. Dressing of Choice
Layer 2: Hard Veggies- This is where you add in carrots, bell peppers, celery, cucumbers, broccoli, cauliflower, etc.
Layer 3: Protein- This is where you will add the cheese, meats, beans, hard-boiled eggs, etc.
Layer 4: Soft Veggies- In this section you will add tomatoes, onions, corn, avocado, etc.
Layer 5 (Top of Jar): Greens to the Brim- Add in your lettuce and/or spinach.
Try to keep the ratio of each jar about half-and-half. That means half of the jar holds the toppings, dressing, grains, proteins and half of the jar holds the greens.
As I mentioned I like to make several of these jars on Sunday evening so I’m prepared for speedy grab and go lunches later on in the week. Luckily these salads last a week in the refrigerator!
Because these jars are so full to the brim you might have to eat off a layer or two of greens (yum!), then replace the lid, shake the heck out of it to distribute the dressing, and then dig right in with a fork.
Hope you enjoy my creations and they make meal planning a success!
Lynell
Coborn’s, Inc. Graphic Designer
Click Here for more articles by Lynell [...]
Read more...

January 19, 2016Time to get fancy! Let’s talk fondant. Get out your rolling pin and nonstick mat and prepare those arm muscles for a little work out. I’ve included a little video to see the process but let’s also discuss the process from supplies to cake.
First thing you’ll need, a few special supplies. A cake, lightly iced. When you put the fondant on top it can get a bit too squishy and create a mess if your frosting is too thick. I’m going to be covering an 8” round, double layered, cake. I used 1 lb. of fondant to cover my cake but you could use a little more to give yourself a little wiggle room when covering. You should also have a fondant smoothing tool, a paddle like looking device, and a nonstick silpat mat for rolling on. Most important you need a rolling pin. I like a big heavy rolling pin for the job. You’ll also need to sprinkle powdered sugar, I like to use a shaker for this, but you could do it by hand too. I also like to use a pizza cutter for trimming my cake. It will roll smoothly around the cake. I don’t use a knife, those I keep far away from the silpat mat. Any knicks or cuts you leave behind when using a blade will show up forever after when you roll out fondant.
Ok, now to get rolling. If you want to color your fondant go ahead and do that first, then cover it up to keep it from getting crusty. Next I base ice my cake and then keep it close as I go back to start on the fondant again.
Knead your fondant, a lot. Keep kneading until it feels silky and smooth. Your hands should warm it up and make it pliable. The more you knead it the better your fondant covering experience will go. If your fondant feels dry and stiff, keep kneading. There should be a little stretch. Once it’s warmed up you can start rolling it out.
Dust your mat with powdered sugar and place your flattened ball of fondant in the center of the mat. I usually squish it out a little into the shape I want, a circle or a square. Dust the top a little with powdered sugar then start rolling. Keep rolling and rolling. Work the fondant into the shape you want. Rotate your pin, rotate the fondant. If it gets too oval or rectangular don’t be afraid to stretch back into the shape you want with your hands. Covering your cake will be easier if you can keep your fondant in a shape relatively similar to your cake. Keep checking the thickness. Give a little more muscle to the parts that are thicker. It can be tempting to use a thick a slab of fondant on your cake in the excitement of covering your cake, but be patient. A thick slab isn’t going to taste good and can squish your cake down creating slouching and puckering after an hour or so. Go thin. Shoot for about ¼” or less for a typical cake, but a little on the thicker side of that for a shaped cake to allow for stretching.
Now that you are at your desired thickness and size you are ready to cover. How big should it be? The height of your cake x 2, plus the width of the top. Then add a couple inches to allow for fidgeting and fussing.
You want to do the next steps in one, uninterrupted step. Don’t answer the phone, don’t stop for a snack. The fondant is already drying and getting a skin and if you walk away it will wrinkle and tear when you try to do anything with it, then you get to start all over.
Move your iced cake over next to your fondant slab. There are many way and tricks to picking up fondant. I don’t use them. I just pick it up like a pizzeria guy. Do it quick, yet gentle, and keep the fondant moving and you shouldn’t get any tears. If you stand around thinking with it draped over your fingers, yes, it will get deformed, but why are you just standing there? Place your fondant over the cake. There should be a little moisture left in the frosting to make it stick. If you think you are going to take more than 15 minutes to roll out your fondant covering your cake wouldn’t be a bad idea.
Lay your fondant across the top, let the sides drape down. Use your hand to smooth out the fondant from the middle to the outside. Then use your smoothing tool to briskly rub the surface. Apply pressure, just enough to work out any air bubbles. Try to work from the middle to the outside to move out any bubbles. Work quickly; your sides are starting to firm up.
Now for the tricky part, the sides. You need to start smoothing the fondant to the frosting. Work in small areas, going in a circle around your cake. You don’t need to stick it all at once. Imagine there are horizontal lines on your cake, about an 1 or so apart, just work from the top imaginary ring down to the next. By the time you get to the bottom half you’ll need to gently tug and stretch at the fondant to avoid the folds and pleats. Keep moving, keep working at it, and keep being patient. Smooth as you go to avoid air bubbles.
Once you have your cake covered you can trim the excess off from around the bottom with your pizza cutter. Now pick up your smoother again and start rubbing all over. At this point you are trying to polish the fondant up. Rub out any ripples, move any air bubbles down and out. If you have any stubborn bubbles you can poke a small hole with a thin pin and let the air out. This will leave a hole, but sometimes it’s worth the trade off on stubborn bubbles.
Congratulations! You did it! You have a smooth fondant cake. Have fun dressing it up from this point. You can paint it, stick fondant to it, and quilt it. And don’t forget the important part, you can eat it.
Amanda
Coborn’s Cake Decorator
Sartell, MN – Pine Cone Road
Click Here for more articles written by Amanda [...]
Read more...

May 28, 2015Irresistible Herbs
Enhance the flavor of any dish, from breakfast to dessert, with just a sprinkling of herbs. Each herb adds a unique taste, with color and texture providing an unexpected bonus.
Storing. The life of fresh herbs will be prolonged by placing the stems in a glass with an inch or two of water. Cover the leaves with a plastic bag and they’ll keep for up to one week.
Dried herbs should be kept in containers with tight-fitting lids in a cool, dark place. Ideally, they should be used within six months of purchase. After that, they can still be used, but adjust the amount in your recipe, as they become less potent.
Prepping/chopping. Always rinse herbs in cool water to remove any dirt and dry in paper towels. Remove leaves from the stems before chopping herbs like basil, marjoram, mint, rosemary, sage, tarragon and thyme. To easily strip leaves from the stems of herbs like rosemary or thyme, hold one end of a sprig between your thumb and forefinger of one hand and slowly but firmly pull in the opposite direction from which the leaves grow with your thumb and forefinger of the other hand. The stems can be reserved to flavor sauces, soups and stews. The stems can then be removed before serving.
A sharp knife is essential for chopping fresh herbs. A dull knife will bruise the tender herbs and leave most of their flavor-packed oils on the cutting board. Fresh herbs only require a rough chop for maintaining optimum flavor.
To chop small-leaf herbs, gather the leaves into a pile and hold in place. Cut across herbs with a large knife to coarsely chop. For large-leaf herbs like basil and mint, stack the leaves and roll them from tip to stem, then cut across to form long slices, also known as chiffonade. Gather slices and cut crosswise to chop.
Cooking. When substituting fresh herbs with dried herbs, the fresh to dried ratio is 3:1. For example, if a recipe calls for 1 tablespoon (3 teaspoons) fresh herbs, you would substitute with 1 teaspoon dried herbs. Just remember, if you’re using dried herbs, they need to be added earlier in the cooking process, as the flavor takes longer to incorporate. Fresh herbs can be stirred in at the last minute.
dill – Feathery green leaves, known as fronds, with a pungent and aromatic flavor. A small amount brightens salads, eggs, soups and sauces, and is often used in pickling. It’s also considered an ancient digestive aid.
basil – With fresh clove-like flavor, the Greeks referred to this versatile herb as the “Herb of Kings.” From pasta sauces to seafood and vegetables, and an essential in Mediterranean dishes like pesto, this herb enhances taste without overwhelming.
mint – Cool and refreshing, with over 30 varieties available, this sweet herb enlivens lamb, fruit dishes, baked goods and desserts. Its invigorating flavor can also be experienced in drinks such as the classic mint julep or recently popular mojito. The leaves also make an attractive garnish.
thyme – A member of the mint family, this herb has a slight lemon aroma. It’s a staple herb of French cuisine, and is often used to flavor meats, vegetables, poultry, fish, sauces, stews and stuffing.
chives – Slender, hollow stems with a delicate yet mild onion flavor, also known as an appetite enhancer. To easily chop chives, snip them with scissors. Use them to perk up soups, salads, egg dishes, sauces, dips, potatoes and cottage cheese.
cilantro – Parsley-like leaves of the coriander plant with a lively, distinctive flavor that meshes well with spicy dishes. This herb is widely used in Asian, Caribbean and Latin American cuisines.
rosemary – Sweet and highly aromatic with hints of lemon and pine, this herb was originally used to treat ailments of the nervous system. The flavor complements meats, especially lamb, poultry, vegetables and even fruit salads.
flat-leaf parsley – A mild herb with a slight peppery essence. While curly parsley is often used to garnish plates, flat-leaf Italian parsley, with a more pronounced flavor, is the variety of choice for most cooks. This all-around herb plays well with beef, pork, vegetables, rice and pasta dishes, cheese sauces, soups, herb butters and stuffing. [...]
Read more...

May 28, 2015Fun & Healthy Food Ideas for Kids
bugs on a log
Who’s afraid of a little bug? This is a delicious (and easy) treat the kids will love. Simply wash and thoroughly dry a celery stick. Spread or pipe peanut butter or a peanut butter alternative into the natural curve of the stalk. Top with raisins, coconut, nuts, cereal or dried cherries.
fruit kabobs
Kids love to help out in the kitchen. Buy some wooden skewers or craft sticks and some of their favorite fruit. After cutting up the fruit, sit the kids down and let them make their own kabob creations. A side of flavored yogurt will add some special zing!
smoothies + veggie juice
Fruit smoothies are all the rage for children and adults alike. Try making one with your favorite fruit and either milk or yogurt. Don’t turn your nose up at vegetable juice… add some apples to carrot juice and you’ll never look back. Yum!
food as art
Let your children discover their taste buds along with their artistic talent. A great culinary masterpiece can begin with bagels and low-fat cream cheese. Set out some healthy toppings, like dried or fresh-cut fruit and veggies, and encourage their creativity.
mama mia
Every kid loves pizza. Try making a nutritious version at home using whole wheat pizza dough and low-fat cheese. Allow the kids to select the fruits and veggies to use as toppings. Let the kids help you put it together for all to enjoy. There’s no limit to the combinations! [...]
Read more...

May 28, 2015It’s a Wrap
Having trouble trying to think of what to make for tomorrow’s lunch? Well, look no further. Wrap sandwiches are a fun alternative to the classic sandwich, especially for younger children.
Over the last few years, wraps have turned up in every food venue with virtually every combination inside. There are so many wrap flavors to choose from now – it makes eating lunch more exciting. Why not come up with your own signature combination with the kids? You just may have yourself a winner!
Here are a few healthy suggestions:
tomato, cucumber & hummus on a zesty garlic herb wrap
cream cheese, shredded carrots, apple & raisins on a multi-grain wrap
smoked turkey, grape tomatoes, Swiss cheese, basil & low-fat mayo on a garden spinach herb wrap
peanut butter, sliced bananas & honey on a multi-grain wrap
turkey, avocado, turkey bacon,tomato & light ranch dressing on a spinach wrap
chicken breast, Cheddar cheese & BBQ sauce on an original wrap [...]
Read more...
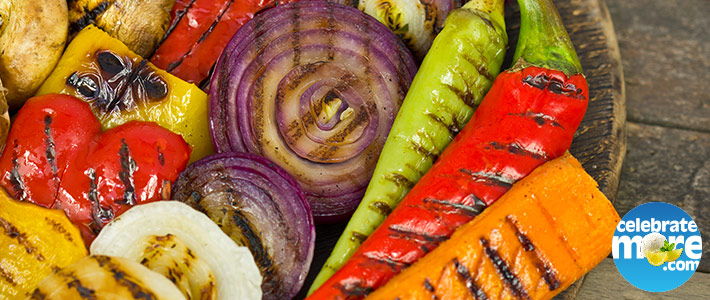
May 1, 2015Vegetable Grilling Tips
There’s nothing complicated about grilling vegetables – just choose your favorites, chop, and throw on the grill. Here are just a few helpful hints we’ve found that can make you look and feel like an old pro:
Start with clean grates and lightly coat the surface with oil using a cloth or grill spray prior to preheating the grill. The oil will seal the pores of the grate’s surface and minimize sticking. Tossing vegetables in a little oil is another no-stick trick.
Preheat the grill on medium-high heat. If you can hold your hand five inches above the grill for only three to four seconds, then the heat is just right.
Cut vegetables into equal-sized pieces to ensure vegetables will be finished cooking at the same time.
Turn the vegetables every three minutes or so for even cooking, and remove from grill before getting too soft. They’ll continue cooking after being removed from the grill.
For a flavor boost, marinate vegetables in equal parts olive oil and balsamic vinegar, minced garlic, fresh herbs such as basil, oregano, marjoram and/or rosemary, and salt and pepper. [...]
Read more...

May 1, 2015Grilled Veggies – A Fresh Summer Treat
There’s nothing quite like the sweet summer taste of grilled vegetables. Grilling imparts just the right amount of smoky flavor, boosting natural sweetness. Grilled vegetables make for brightly colored sides, can be layered into lasagna, chopped and used as a dip, or made into a sandwich along with your favorite cheese.
asparagus
One of the easiest vegetables to grill, simply trim the ends of the asparagus, brush with a little olive oil, sprinkle with salt and pepper and they’re ready to go. Spears are perfect over a bed of greens along with chopped tomatoes and lemon vinaigrette.
bell peppers
A great way to get your daily vitamin C, choose red, green, yellow and/ or orange for a colorful grilled favorite. Cut them into rings or skewer along with other vegetables. These beauties are sublime tossed with pasta, or as part of an antipasti plate along with olives, Italian meats and cheeses, and crusty bread.
tomatoes
While technically considered fruits, juicy tomatoes come alive on the grill with their brightly charred skins. Large tomatoes can be cut into half-inch-thick slices while cherry tomatoes can be skewered or placed right on the grill.
leeks
A bit out of the ordinary, leeks just need a bit of prep before a quick grill. Using only smaller-sized leeks, remove tough outer leaves and trim root ends. Cut lengthwise in half and rinse in cold water. Place in boiling water two minutes or until just softened, then plunge into ice water. Pat dry, combine with a little olive oil and grill until just browned. Toss grilled leeks with a bit more olive oil, a splash of white wine vinegar, salt and pepper for a delectable side dish.
corn on the cob
Fresh-grilled corn on the cob is the perfect summer treat. Pull back husks and remove the silk, then replace husks and soak in water 20 minutes before grilling. When grilled, the corn will actually be steamed in the husks. Spread the grilled cobs with butter, and sprinkle with chopped fresh herbs and seasonings. Or, cut grilled ears into three-inch pieces for the perfect-sized barbeque side dish.
mushrooms
The earthy flavor of mushrooms combines perfectly with the rustic flavor of the grill. Try skewering cremini or white mushrooms along with meats or other vegetables for tasty kabobs. Or, marinate whole portobellos in your favorite vinaigrette and serve on a bun for a vegetarian burger.
red, white, or yellow onions
Excellent choices for grilling, simply slice onions into half-inch-thick rounds or cut into quarters. Or, leave the skins on and cut in half. Toss or brush onions with a marinade and grill away. These beauties are the ideal topping for burgers and pizza, or served with steak. [...]
Read more...

April 30, 2015Avocados Abound
Enjoyed in cuisines all over the world, it’s no wonder that avocados seem to be enjoying a renaissance. Its name comes from the Nahuatl word ahuacatl, and was cultivated first by the Aztecs in the region now known as Mexico and South-Central America as far back as 8000 BC. Spanish colonists had a difficult time pronouncing the berry as aguacate, which eventually morphed into the English “avocado.” Avocados are commonly referred to as “butter fruit” in South Asia and South America, where they’re often served with sugar and milk over ice as a refreshing and cool dessert.
The most popular avocados in the United States are the Hass variety, sometimes called “alligator pears” for the rough, bumpy skin that covers a smooth, pale green flesh. Avocados require tropical and sub-tropical climates, making California and Florida the two primary sources in the U.S. with the growing season beginning in the spring and continuing through early fall.
Though primarily recognized as the main ingredient in guacamole, these buttery-smooth and nutrient-rich fruits are versatile additions to just about any dish, from dips and spreads to burgers and tacos. Avocados are most often used in their raw form, requiring only peeling and dicing without losing the many nutrients during cooking or processing. In fact, avocados are considered a “super food” due to their abundance of monounsaturated fatty acids, dietary fiber and minerals like iron, potassium and magnesium.
Avocados begin ripening when picked and the green skin will begin to darken to nearly black. It’s best to check the ripeness of the fruit by gently squeezing it in the palm of your hand; a ready-to-eat avocado will be slightly firm, yet yield to gentle pressure. Avoid avocados with soft spots and dark blemishes, as these are indicators of over-ripeness. Ripe avocados should be used within one to two days. Firmer fruit with greener skin is better if you won’t be using them for a few days and they’ll keep for up to a week when stored at room temperature. Once ripe, avocados can be refrigerated for another one to two days.
It’s best to cut the fruit immediately before serving to preserve their bright green color. Once the avocado flesh is exposed to air, it begins to discolor and brown. Lime or lemon juice can help slow this process in prepared dishes, but the key is to minimize exposure. Unused halves can be sprinkled with lime or lemon juice, then wrapped tightly with plastic wrap and refrigerated. [...]
Read more...
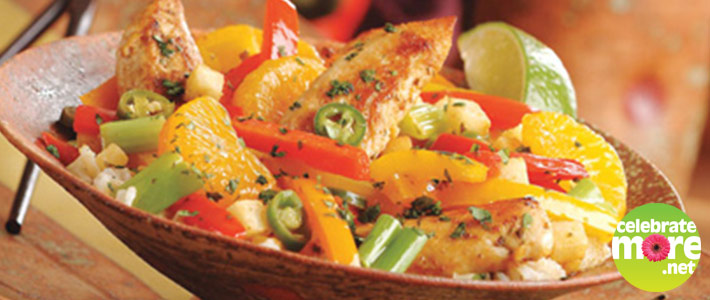
December 29, 2014Healthy Cooking Methods
Healthy eating begins by selecting healthy ingredients. But you also need to be mindful of how the items are cooked. For instance, mushrooms on their own have a variety of health benefits, but eating deep-fried mushrooms is far different than eating those that have been sautéed. Here are some cooking techniques that will allow the natural taste of fresh ingredients to come through while using only a minimum amount of
fat or salt.
stir-frying
Popular in Asian cuisine, stir-frying is an excellent, healthy cooking method when a meal needs to be prepared quickly. While stir-frying is usually done in a wok, a wide, shallow pan will also work just fine. When stir-frying, only a small amount of oil or seasoned sauce is necessary. Stir-fries are a go-to cooking method for health-minded folks because of the technique’s versatility. Uniformly cut vegetables, skinless chicken breast, tofu, fish and lean meat can be used to make an endless variety of stir-fries.
steaming
Anything but boring, steaming is a nutritious and delicious way of preparing foods. Steaming is typically done in a perforated basket that is held over a pot of boiling water for a set amount of time. Flavor can be added by placing fresh herbs and spices in the water or directly on top of the food. Vegetables, fish and shellfish lend themselves beautifully to steaming.
poaching
This simple but delicious healthy cooking method can be done by gently simmering ingredients in a pan of water until the food is tender and cooked through. Bouillon, broth or juice is often used in place of water to infuse additional flavor into foods. Poaching works well for skinless chicken breast, salmon, white fish, eggs and some fruits and vegetables.
roasting
Relying on direct oven heat, roasting gives food a sweet and caramelized taste with little fat. Practically any vegetable can be roasted, as can whole chickens and lean cuts of meat. The ingredients are generally placed in a roasting pan or on a baking sheet with an assortment of herbs and a small amount of good-quality oil.
broiling
Broiling uses high heat, allowing foods to cook in a short period of time. It is an ideal low fat way of cooking meat, as the fat simply “drips away.” The overhead heat source cooks the outside surface of foods quickly, so thicker pieces of meat, vegetables or seafood may need to be sliced thinner or placed further from the heat source for even cooking.
grilling
Grilling is a great option for cooking foods using a minimal amount of fat. The heat of the grill browns the outside of the food, sealing in rich flavors, while fat drips off the food, similar to broiling. With the ability to grill either over direct or indirect heat, almost any food can be grilled including lean cuts of meat, poultry, fish, tofu, vegetables and fruits. Get creative with your grilling skills utilizing skewers, grill-top baskets and foil-packets. [...]
Read more...
