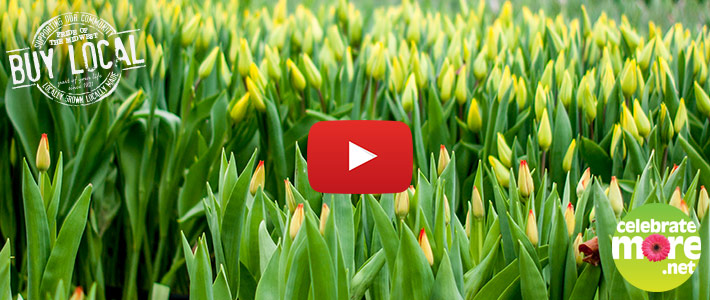
February 27, 2018American Tulip Day is just around the corner and nothing says Spring quite like a bouquet of fresh Tulips! We visited our friends at Len Busch Roses, which is located in Plymouth, Minnesota, to go behind the scenes to learn how they grow their beautiful tulips!
Len Busch Roses grows much more than just Tulips though… Roses, Alstroemerias, Gerberas and Lillies are all part of the vast variety of beautiful flowers that are grown on the 15 acres of enclosed growing space. Growing more than 8.5 million stems every year it’s no surprise they’ve won awards from the Society of American Florists!
For more information on Len Busch Roses, visit their website and make sure to pick up a fresh bouquet of their Minnesota Grown Tulips at your local Coborn’s, Cash Wise or Marketplace Foods store to celebrate American Tulip Day on March 3rd! [...]
Read more...
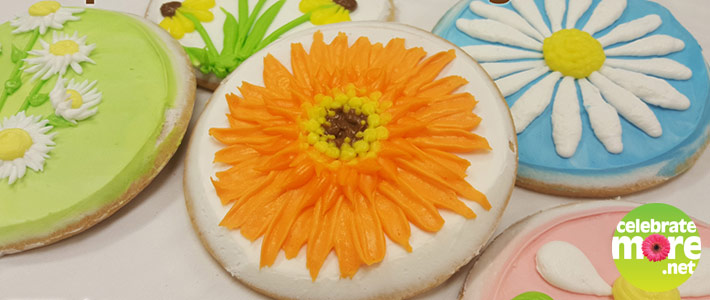
July 18, 2017Summer, a great time to grow your frosting flower garden. And with so many colors and varieties you’ll never have to make the same cake design twice. I thought we could focus in on a specific flower family, the daisies, and explore with inspirations from nature. Let’s try 5 different ways of piping daisies, from a cute and quick style to a detailed eye catcher. I’ll be piping my flowers on large cookies but naturally you can pipe these on any dessert that needs decorating.
Bubble Daisies
A good place for beginners to start is with the bubble daisy, but don’t think that this flower is only for the inexperienced. Even the pros know this cute little guy is great for a young child’s cake or for a bold, brightly colored, style. Using a very fine tip you can create a delicate pattern for a wedding or sweet details on a baby’s cake. While this flower isn’t exactly a recreation of something you’d find in a garden, it’s a classic decorating option to have up your sleeve.
We’ll start with a round tip, the size is up to you. I usually use somewhere between a #6 and #8. For a tiny flower you could use a #2 or #3 or load up a #12 for giant petals. For my bubble daisies today I am using a #8 round.
To create your flower you are going to draw petals from the outside of the flower to the center. You want to pipe a basic tear drop shape. Position your tip, squeeze, pull the icing towards the center of the flower, and ease off the squeeze to create the tapering effect. 5 or 6 petals per flower will be sufficient. You could do more than 6 but it loses that simple groovy feel. I, myself, like the space between the petals. It can get a little cluttered feeling otherwise. But hey, it’s your flower and you are the boss in your kitchen. One important tip to keep in mind is your flowers do not need to touch in the middle. Bring the tips in to the center, have them tickling each other a bit, but don’t feel like they need to connect. This can create crowding and a frosting pile that will cause you flower center to unnaturally rise up to the heavens.
To finish your daisy add the center dot of icing with another round tip, I just use a tip of equal size but one size up or down really won’t hurt anything. Pipe your dot and there you go! I added leaves to my flowers using a round tip as well. It’s the same teardrop shape we used to make the petals but now we pipe from the flower outwards for our leaf shape. I like to do these leaves instead of using a leaf tip since the style matches better. They both have a cartoony/informal feel versus adding in a realistic looking leaf with an informal flower.
Simple Black Eyed Susan-Side View
A long title for a quick little flower. This one is very similar to the flower we just made, the main twist being this is a side view of a flower. This one is a little something different to throw in that creative curveball. If you look up photos of black eyed susans this one takes inspiration from later in the season when the petal droop down a bit, leaving the centers stretching up to the sky.
Start by drawing a few stems for your flowers. I used a size 3 for my stems. Next we’ll add the petals in a golden yellow or yellow. Piping these is done the same way we piped the bubble daisy. A #5 round, or somewhere in that area, would work well. This time we want all the petals to be hanging down as shown. 4 or maybe 5 petals would be plenty to fill the space. Try to make these petals a little longer and thinner than the petals we piped for the bubble daisies.
The centers are made with some brown frosting. Using a #5 round tip I began with piping a dot and then just giving it a little more fullness to the top of the flower that is facing the sky. The shape should be more of an oval or lopsided dot than a perfect circle.
Add in some leaves or grass at the base of your stems. These flowers can also be cute when done as a border by drawing gently curving vines and then adding your black eyed susans and some leaves to that. You could also use the same technique to create a coneflower by switching to a shade of light pink instead of the yellow petals.
Shasta Daisy
Let’s try our hand at something a little more realistic looking. Using the classic white daisy, a Shasta, let’s up the piping skill. Now, the number one thing people have a problem with is keeping round flowers in a round shape. Things tend to get squarish or triangular when piping large, mutli-petaled flowers. I’m going to use a little trick to create a guide. Using a decorating tip I make a circle on my frosted surface. The small circle in the middle shows me where the middle will be and helps with keeping that round shape. Just ever so lightly touch the frosting with your circle tool, it doesn’t need to be deep.
We’ll begin with piping the petals. Start at the outside of the flowers and pipe your petal in towards the center using a round #5. Instead of just squeezing out the petals with thick to thin I’m going to complicate it just a bit. Start with a medium thickness and move towards the center… BUT give the bag a squeeze shortly after you start to move the tip to widen the petal before tapering away to a slender petal at the small guide circle. So, in terms of thickness that’s: medium thick medium thin. Or, if I was standing over your shoulder I would be saying “Ok, and squeeeeze, MORE SQUEEEEEEEZE, let off! Taper it! Ease off the squeeze! Ahhh… good. Again!”
Now, you might want to practice that a few times on a surface that isn’t your finished product. Once you feel like you have it you can start on your flower. I piped four petals at North, South, East, and West and then started piping in each quarter section. By breaking it into 4 quadrants this will help keep your petals going straight out versus a spiraling or curved effect. Just as we did with the bubble daisy, you don’t need to go all the way to the center, we will be putting something there when you get done piping.
To finish our flower we’ll add a yellow center. A #10 tip will make a nice circle and then I like to add in the little dot texture with a #2 or #3 for a little more realism.
Gerbera Daisy
Well, now that we are really well practiced let’s up the ante to a detailed wonder of a flower. I’ll be making an orange gerbera daisy but they come in so many colors you choose from an endless supply of hue inspirations from Mother Nature.
For this flower I’ll be using a mum tip, or the U shaped tip. Mine happens to be a #79. We’ll start with making some circle guidelines like we did for the Shasta daisy to keep us in a circle. For this flower let’s do a small inner circle and a large outer circle. Using an outside line (made with a cookie cutter, or a bowl or a lid) we should have a nice round flower.
This time we’ll be piping from the inside out. Holding my tip at a right angle to the decorating surface, the rounded part of the tip is facing the outside of the flower, I’ll pipe line form center circle mark to just a hair past the outer circle mark. It’s just a simple line, over and over. I’ll do the 4 petals at North, South, East, and West to help keep things headed out in straight lines. You’ll notice that there are gaps between our petals at the outside of our circle and that’s ok. We are going to do a second layer of petals that will cover those in-between spaces.
Pipe a second row in the same manner. Inside circle to outside. Stagger the petals to fill in the open spaces. Also, try to end these petals with a little lift at the end by raising your tip as you end the petal.
For the center we’ll pipe a brown center similar to what we did for the Shasta, a big dot covered in smaller dots for texture.
Now, I’ll switch to a slightly darker shade of orange and a #4 round tip. We are going to pipe those tine petal at the center of a gerbera, the ones that would eventually grow into big petals. Make two circles of little spikes around the brown center. My first row is out about a ¼ inch from the brown center, mostly laying flat. Pipe a dot and pull out a bit of icing, creating a slender spike shape. The next row is close to the brown center and I try to pull these up at an angle as I pipe. The finishing touch will be some dainty yellow dots between the orange and the brown. A #2 round will work well.
Bonus Round, Putting petals in Perspective
Using tiny wildflowers from the daisy family, fleabane, let’s touch on how to play with perspective. Why? Because we don’t always need to do our flowers from the top down view. Let’s shake things up and expand our horizons! I’ll be piping my flowers and stems with #2 rounds and for the centers I’ll use a #4. On my cookie I pipe stems but I’ll just breakdown the flowers by the view. Petals I’m piping from the center of the flower to the outside with a taper at the ends.
Bud: A flower that hasn’t opened yet, not too hard. Draw you petals all upwards and from one, flat, imaginary bottom line. The overall shape would be a square or maybe an onion type shape depending on your preference. Pipe a green base to the flower as shown. Thick where it connects to the petals and thin where it connects to the stem.
Upwards: This flower is facing the sun and the petals are curving upwards. This is similar to the bud where they are all upwards from an imaginary baseline. But now they fan outwards. Literally think of a handheld fan you would unfurl at a fancy ball. Now draw that with petals. Next you want to add a yellow center. This should be in a thin oval shape. To finish this flower we will switch back to our petals and draw a few short petals from the base of the oval center and upwards, in front of the flower center. The photo will show this better than I can explain it.
Flat: This is a flower that you are viewing from the side. We will be working in a circle, but with varying our petal length. Let’s imagine our flower with North, South, East, and West lines running through it. Pipe your petals from the center outwards. The petals on the E and W sides should be the longest. The petals on the N and S should be short and stubby. If it help draw a petal or two at each direction with the appropriate length. Then fill in petals in the between spaces, tapering the petal sizes between each cardinal direction from long to short. The center of this flower will also be an oval.
Front: You got this. Draw your petals radiating outwards from the center. A nice circle with even lengths of petals. Add you circular center and you’ve got yourself a flower.
Mixing sizes and views of dainty flowers in with a few big flowers would give a nice natural feel to a frosting arrangement. How pretty would this be in a wildflower bouquet design for a country themed bridal shower or for your garden loving grandma?
That’s a lot of flower options! Once you start playing with colors, maybe mix your daisies in with some roses, you’re sure to impress with your expanded skills. Pastels for spring, neons for summer, jewel tones for fall and crisp frosty colors for winter, you’ll be pleased with how these 5 ideas can expand your cake designs.
Amanda,
Coborn’s, Inc. Pastry Arts Training Specialist
Click Here for more blogs written by Amanda.
[...]
Read more...
January 24, 2017Valentine’s Day is only a couple weeks away and it is coming up quickly. I want to be prepared for it so I’m starting to plan now. It’s time to show the people in our lives how much we love them.
Change of scenery
I really do love to cook and I find the holiday helps to inspire me to be even more creative in the kitchen. Dinning at home doesn’t have to feel like work. Need a change of scenery? Relocate to a different location in your home. How about a picnic on floor by the fireplace? A folding table elegantly set with your finest table linens? What about the dining table that only gets used for special occasions? Mine never gets used so that is the perfect place for that romantic meal. When you eat in spots of your home that are seldom visited it can feel a lot like dining out, but at a fraction of the price tag. Just don’t forget the candles and a little light music to set the mood.
Try something new
Don’t cook the same old dinner, make it a delicious experience that you both will enjoy. I think having great ingredients with new recipes makes cooking feel like fun instead of the same old dinner routine each week. Try pairing store-bought items like fresh fruit, bakery treats and easy appetizers. If you have kids push dinner back and have it after the kids go to bed so you feel like you get a night away without the expense of a sitter.
Involve the kids
Try starting a new tradition for the kids. Anything that can be cut into a heart is an instant celebration from lunchbox sandwiches to pancakes and even heart-shaped pizzas. Make sure to let them get creative with cards and get the paper, glue and crayons out. When they are involved it becomes a family event with lots of laughter. Something as simple as a Pancake Bear holding a heart is enough to send them off to school with a full heart this Valentine’s Day.
Everything is available at Coborn’s
So here is what I have come up with for Valentine’s Day that you can find at any one of our Coborn’s stores.
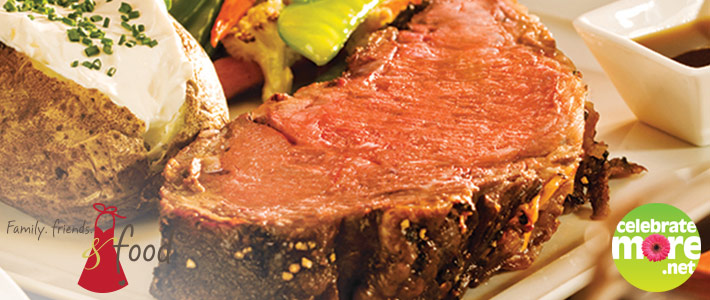
Coborn’s Meat Department
Flame Seared Fully Cooked Pork Ribs
Surf & Turf which includes an 8 oz. NY Strip & 4 oz. Cold Water Lobster
Fully Cooked Prime Rib
Boneless Rib Eye Steak
Fresh Norwegian Salmon
Coborn’s Produce Department
Fresh Asparagus Spears
Chocolate Dipped Strawberries
Coborn’s Bakery
“I Love You” Cakes
Coborn’s Floral
Flowers
Stuffed Animals
Candies
Gifts
Now for my biggest challenge for Valentine’s Day…making up my mind which items I am going to choose for that very special menu. Yikes! I want them all! Happy Valentine’s Day and enjoy!
Jayne
Coborn’s, Inc. Merchandising Specialist Team Manager – Bakery and Deli [...]
Read more...
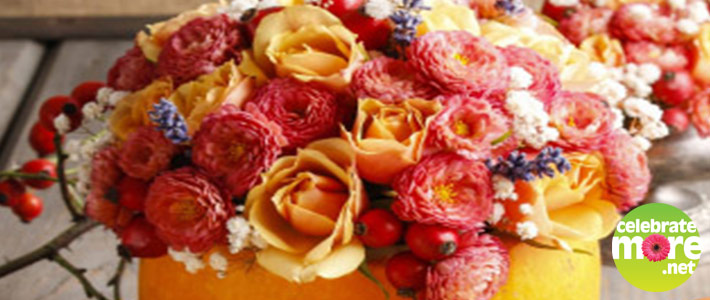
August 25, 2016DIY Fall Decor Pumpkin Flower Arrangement
This seasonal display is delightful on its own or combined with votive candles and additional pumpkins.
You’ll need:
Dried lavender stems
Fresh flowers (such as miniature roses and strawflowers) in seasonal hues
Small pumpkin
Block of floral foam
Dried or artificial berry clusters
Knife
Scissors
Not shown: Fork, plastic wrap, water
1. Use a knife to slice approximately two or three inches off of the top of a small pumpkin.
2. Use a fork to scoop out the pumpkin flesh and seeds.
3. Line the pumpkin with plastic wrap and use scissors to trim away the excess plastic wrap around the opening.
4. After thoroughly soaking a block of floral foam with water, place the foam block in the pumpkin.
5. Use scissors to cut the fresh flower stems at an angle, trimming them to a length that’s slightly longer than the height of the pumpkin.
6. Insert the flowers into the floral foam.
7. Use the dried or artificial berry clusters to fill in the spaces between the flowers.
8. Trim the dried lavender stems and use them as accents between the fresh flowers and the berries.
9. Enjoy the colors of the season! [...]
Read more...
